As a meeting host, you can split your meeting participants into breakout rooms when scheduling the meeting. This can be useful if you already know how you want to split up your participants.
Notes:
- Only 200 participants can be pre-assigned in Zoom meetings.
- If you start the meeting from the Linux client or Zoom Mobile App, you will not be able to see your breakout rooms with pre-assigned participants.
- In order for pre-assigned breakout rooms to work, attendees will need to sign in to their Zoom account associated with the email placed in the CSV upload.
- If you have registration enabled and external participants register for the meeting, you need to assign them to breakout rooms during the meeting.
Note for users of screen readers: letters in parentheses in the instructions below refer to corresponding areas on example images. If you have any questions about these instructions, contact eLearning for assistance.
Enable Pre-Assign Breakout Rooms & Authentication
IMPORTANT NOTE
Pre-assigned breakout rooms only work if the users sign in to their Zoom account associated with the email provided on the pre-assignment. One way to make sure that users sign in is to require authentication for your meeting. This makes is so that anyone that is not signed in to their Zoom account when clicking the join link will be prompted to sign in in order to gain access to the meeting.
Students must sign in using SSO (Single Sign On = BlazerID/Password). Here is a guide on how to sign-in to Zoom on phone or computer when joining a meeting.
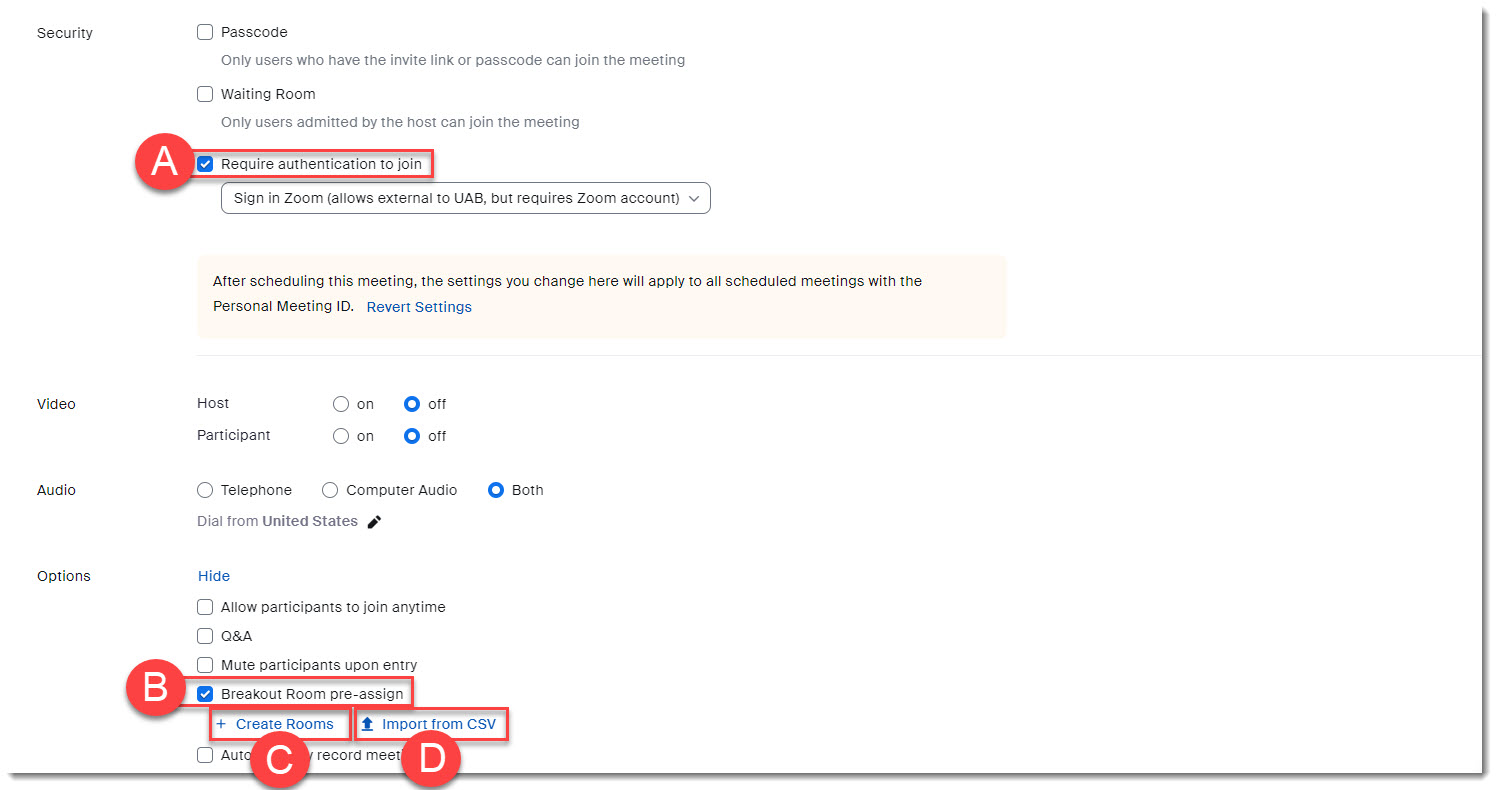
- When scheduling your meeting, check the box for Require authentication to join (A) in the security section and choose which authentication you want to accept (anyone with Zoom account or just UAB Zoom accounts).
- Check the box for Breakout Rooms Pre-Assign (B) under the options section and choose which method you would like to use to pre-assign breakout rooms.
- Create Rooms (C) allows you to use the Zoom interface to create rooms and assign people by typing in their @uab email address. This option will only allow you to type in email addresses of users that have created a Zoom account with UAB.
- Import from CSV (D) allows you to create an worksheet with the desired group names and emails and upload it for pre-assigning. This option allows you to assign users internal and external to UAB.
Pre-Assign Breakout Rooms — Web Portal Option
You can create breakout rooms, name the rooms, and assign users through the Zoom Web portal. Note: When pre-assigning participants using the web portal, you can only pre-assign internal Zoom users that are in the same account (@uab.edu email addresses).
- Click + Create Rooms shown in the previous step to open up the Pre-assign web portal.
- Click the + (A) button beside Rooms to add breakout rooms [limit is 50].
- Hover over the room and click the trash (B) icon to delete a room.
- Hover over a room title and click the pencil (C) icon to change the name of the room.
- Add Users (D) to a room by typing their name then clicking the full name that appears in the list.
Note: If a user does not appear here, they do not currently have a Zoom account with UAB. You can direct the user to create their account or you can use the Import from CSV option.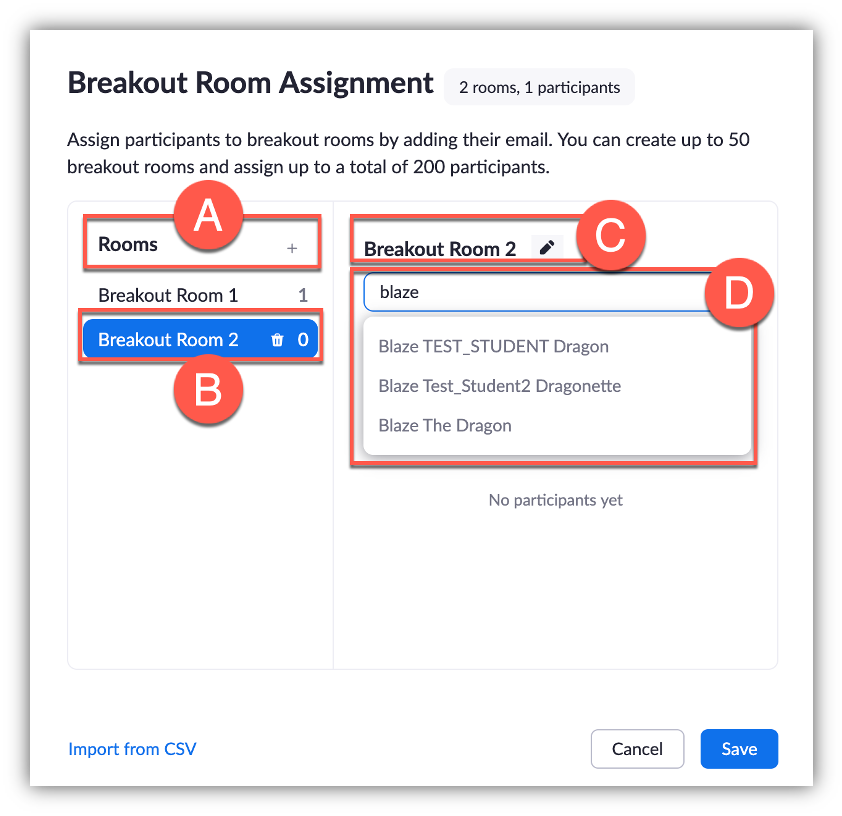
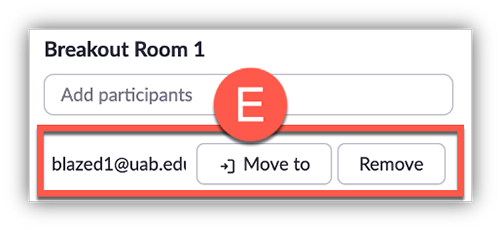
- Hover over an assigned participant to see the option to Move or Delete assignment (E).
Pre-Assign Breakout Rooms — Import from CSV Option
PLEASE NOTE
- Use @uab emails for users internal to UAB
- Emails should be all lowercase
- Some users have alias’s instead of blazerid@uab.edu. Check the UAB Directory to know what a user’s email is.
- The file must be saved as a Comma Separated Values (CSV) file which can be found in the Save as file options.
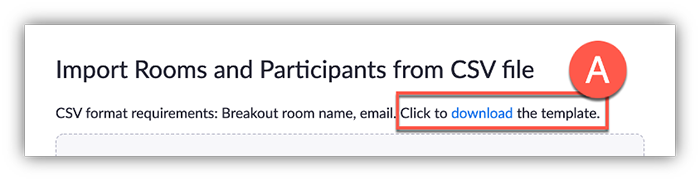
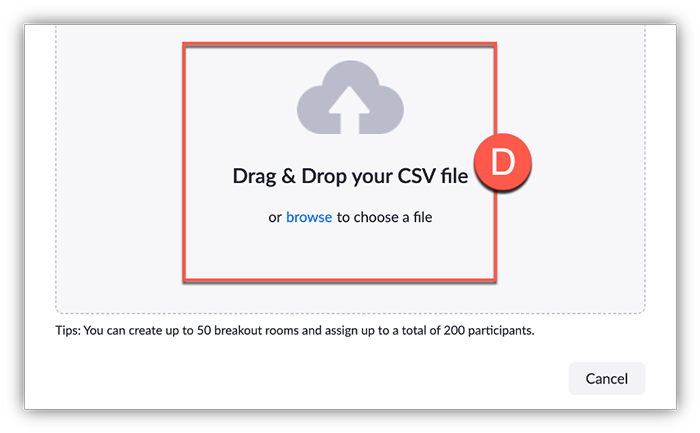
- Click the Import from CSV option to pull up the CSV interface shown in the previous steps.
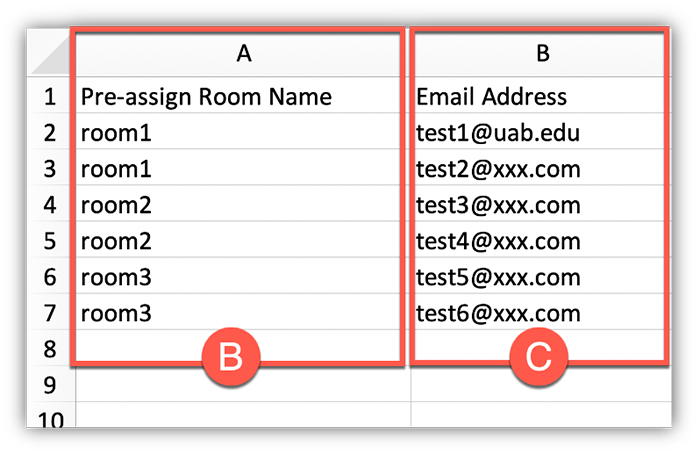
- Download the template CSV (A) worksheet to see the example.
- Fill out the template placing the breakout room name (B) in column A and the participants email (C) in column B.
- When you have finished filling out the CSV, drag that file into the upload area or click browse (D) and select the file.
- Refer to the Web Portal section of this guide to make any adjustments to breakout room names or assignments, then Click Save when finished.
Start Breakout Rooms
- Click Breakout Rooms (A) in the meeting controls to access the breakout rooms you created. You may have to click 'More' (three dots) in order to see Breakout Rooms button. This button is only visible to the Host of the meeting.

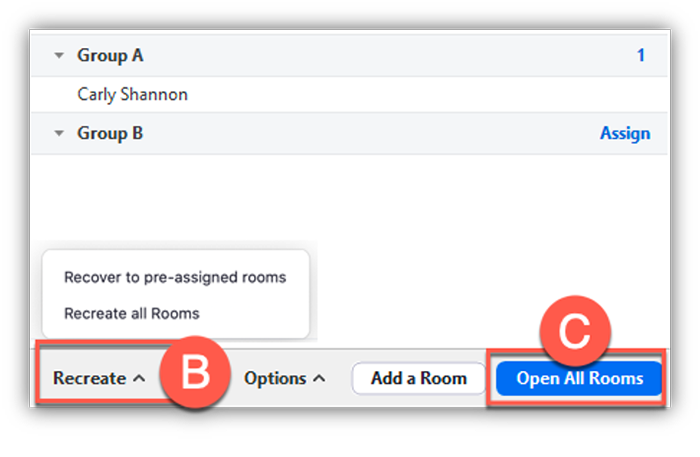
- If a participant is not automatically assigned to the breakout room you specified when scheduling the meeting, click Recover (B) to re-assign participants to their pre-assigned breakout rooms. You can also manually assign users.
- Click Open All Rooms (C) to open the rooms and send the pre-assigned users to their groups.
Learn more about Managing Breakout Rooms.