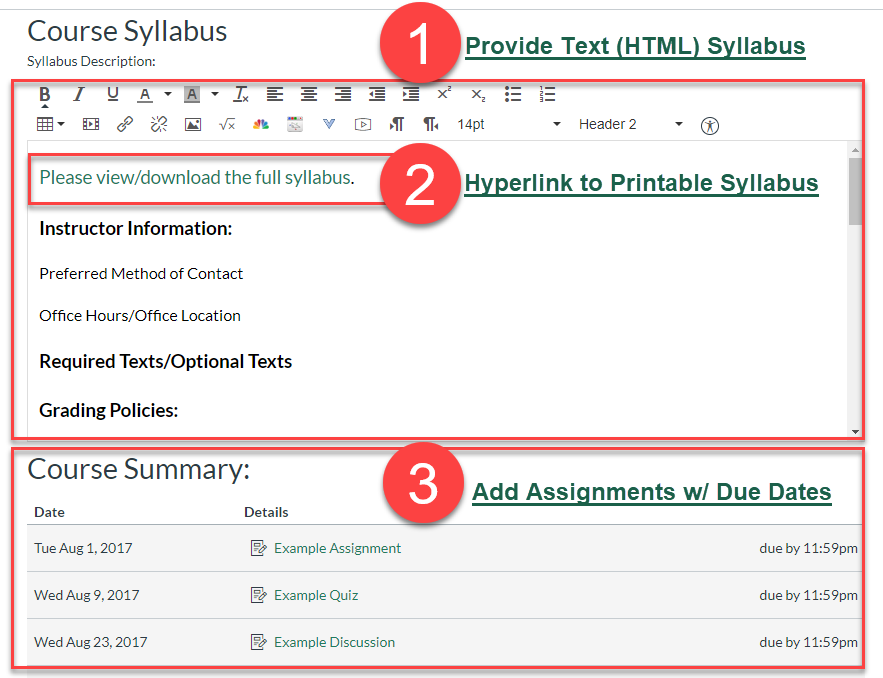
The Syllabus in Canvas makes it easy to communicate to your students exactly what will be required of them throughout the course in a chronological order. The Provost requires that every Canvas course have a dynamic syllabus. A dynamic syllabus contains a 1-Text (HTML) syllabus, 2-Hyperlink to a printable syllabus, and 3-Assignments with due dates. Detailed instructions and tutorial videos for each step are provided below.
Note for users of screen readers: letters in parentheses in the instructions refer to corresponding areas on example images. If you have any questions about these instructions, contact Learning Technologies support for assistance.
1 - Create Text (HTML) Syllabus
Canvas provides a text box where you can manually type information or copy and paste from your Syllabus. We do not recommend copying your entire syllabus into this area, but summarizing important information such as instructor contact information, office hours, grading policies, etc. Watch the tutorial video or follow the instructions below.
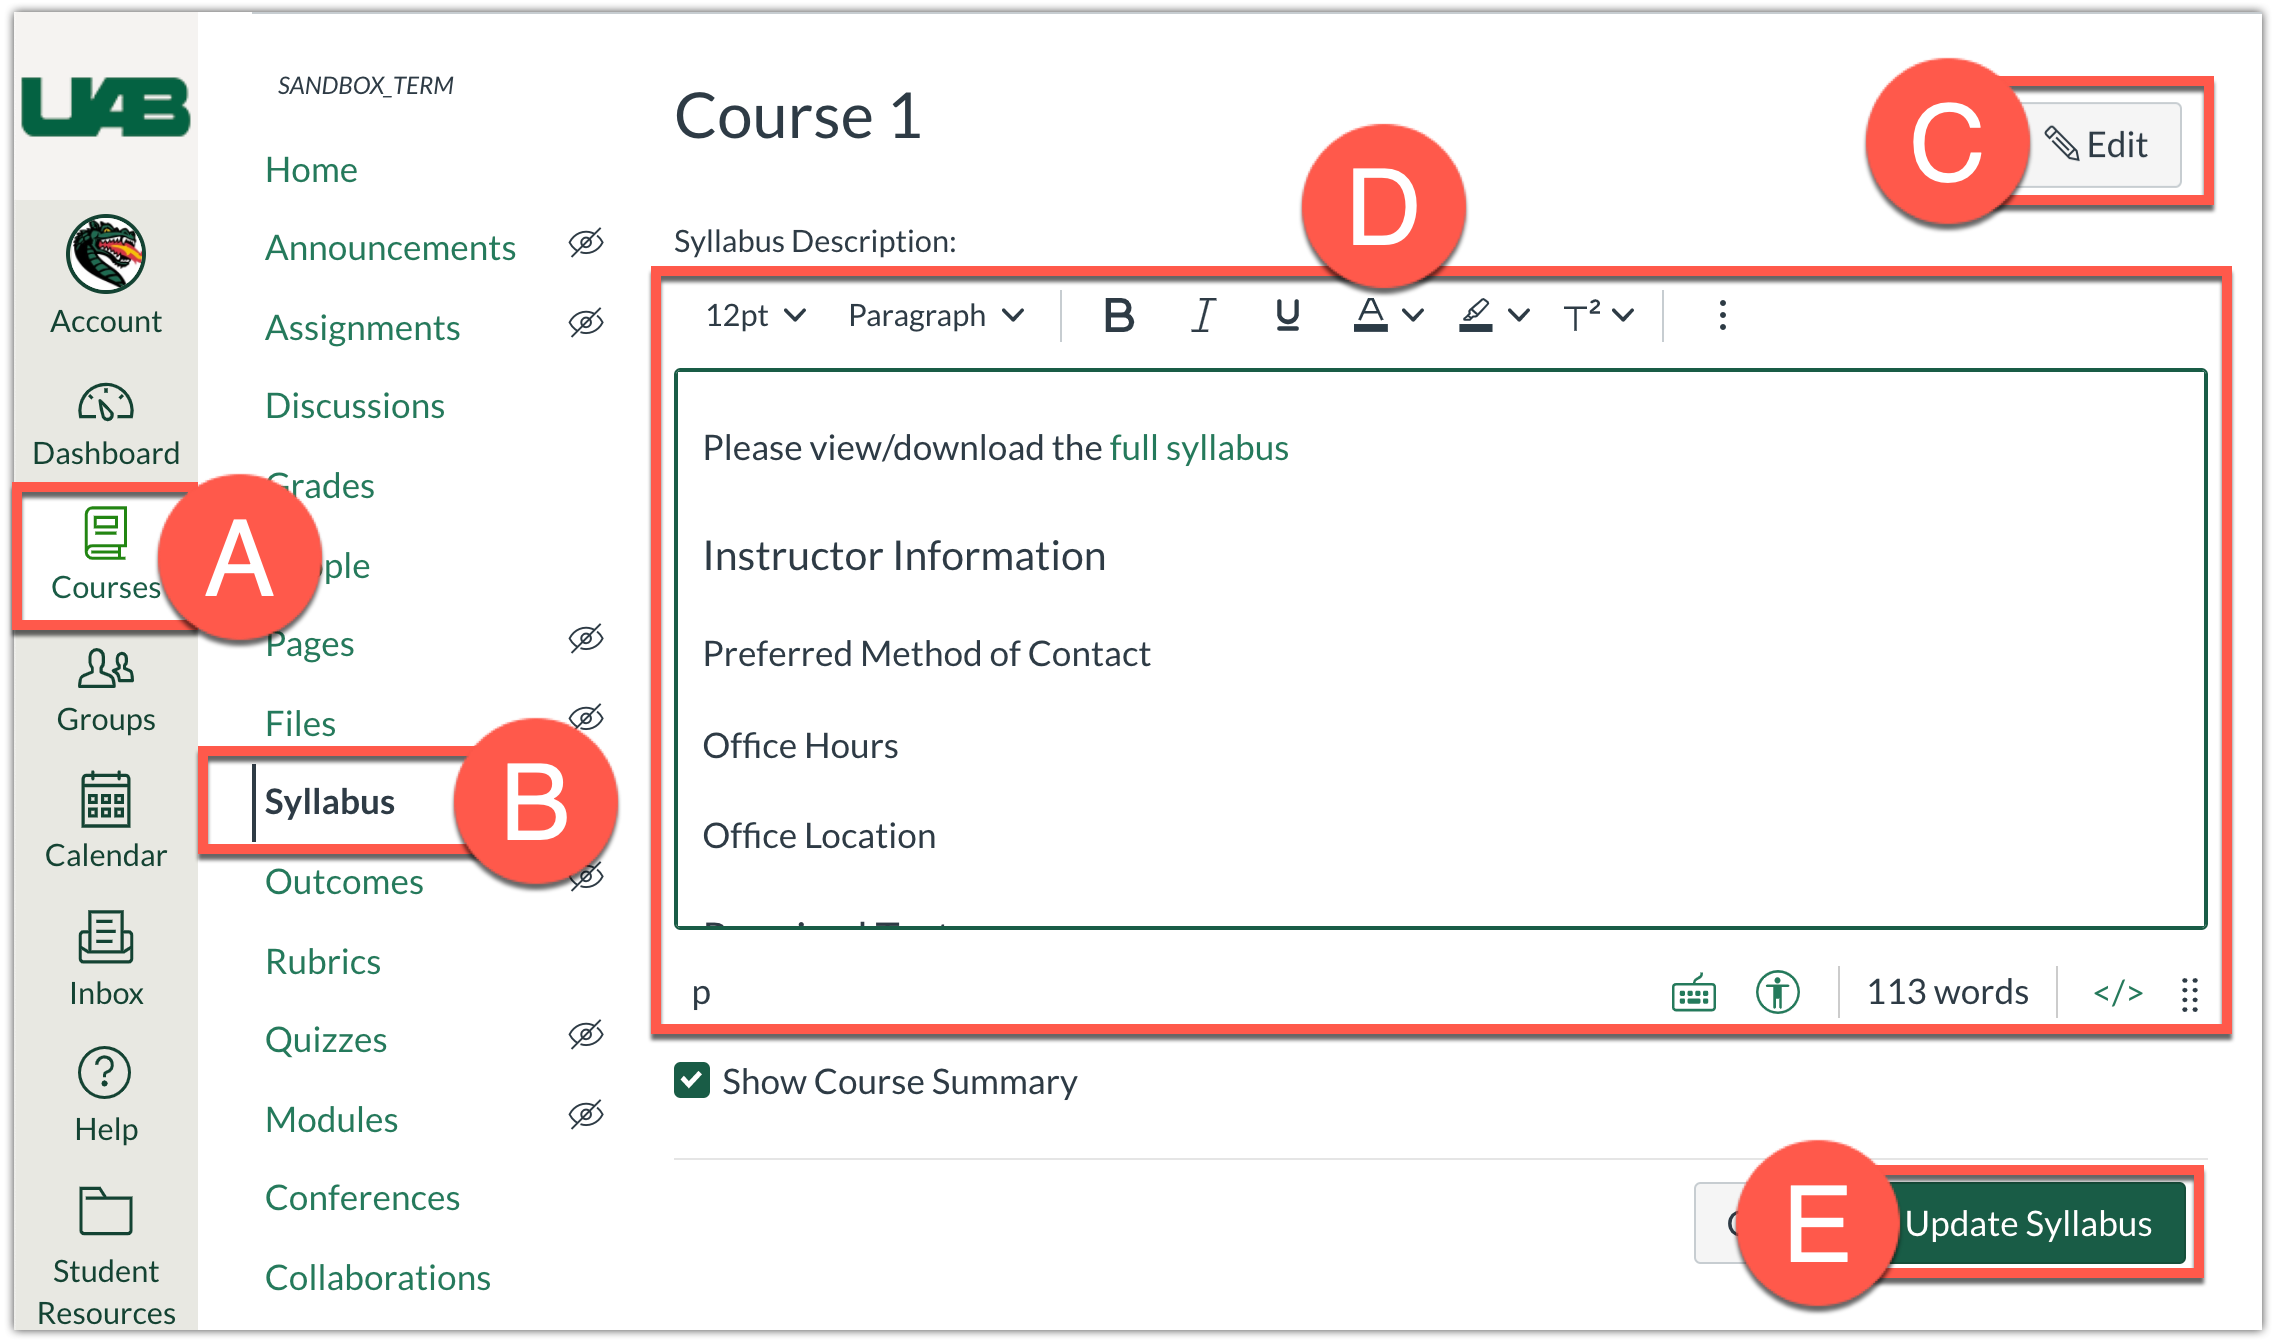
- Click Courses (A) from the navigation menu and choose a course.
- Click Syllabus (B) from the course navigation on the left.
- Click Edit (C), at the top right, to edit the Course Syllabus.
- Manually type the desired information or Copy and Paste (Ctrl + C and Ctrl + V) select information from your syllabus document into the text box (D). Note that you may need to fix the formatting of pasted text and tables. [We reccomend only providing vital information such as Course name/semester, Instructor contact/office hours, and grading information in this text box and then providing a link to your full syllabus shown in the next section of this guide.]
- Click Update Syllabus (E) when you have completed formatting and adjusting your syllabus with the rich content text editor.
2 - Hyperlink to Printable Syllabus
Instead of having your entire syllabus pasted into the text box area, we recommend providing a hyperlink to your full syllabus file (document). Students will be able to click the hyperlink to preview or download the syllabus file. You can hyperlink text to a document you have already uploaded to your course files or you can upload a document from your computer. Watch the tutorial video below or follow the instructions for your situation below.
Hyperlink to a New File from Your Computer
If you have not already uploaded your syllabus document into Canvas, you can upload it and hyperlink it to the syllabus page at the time by following the instructions below.
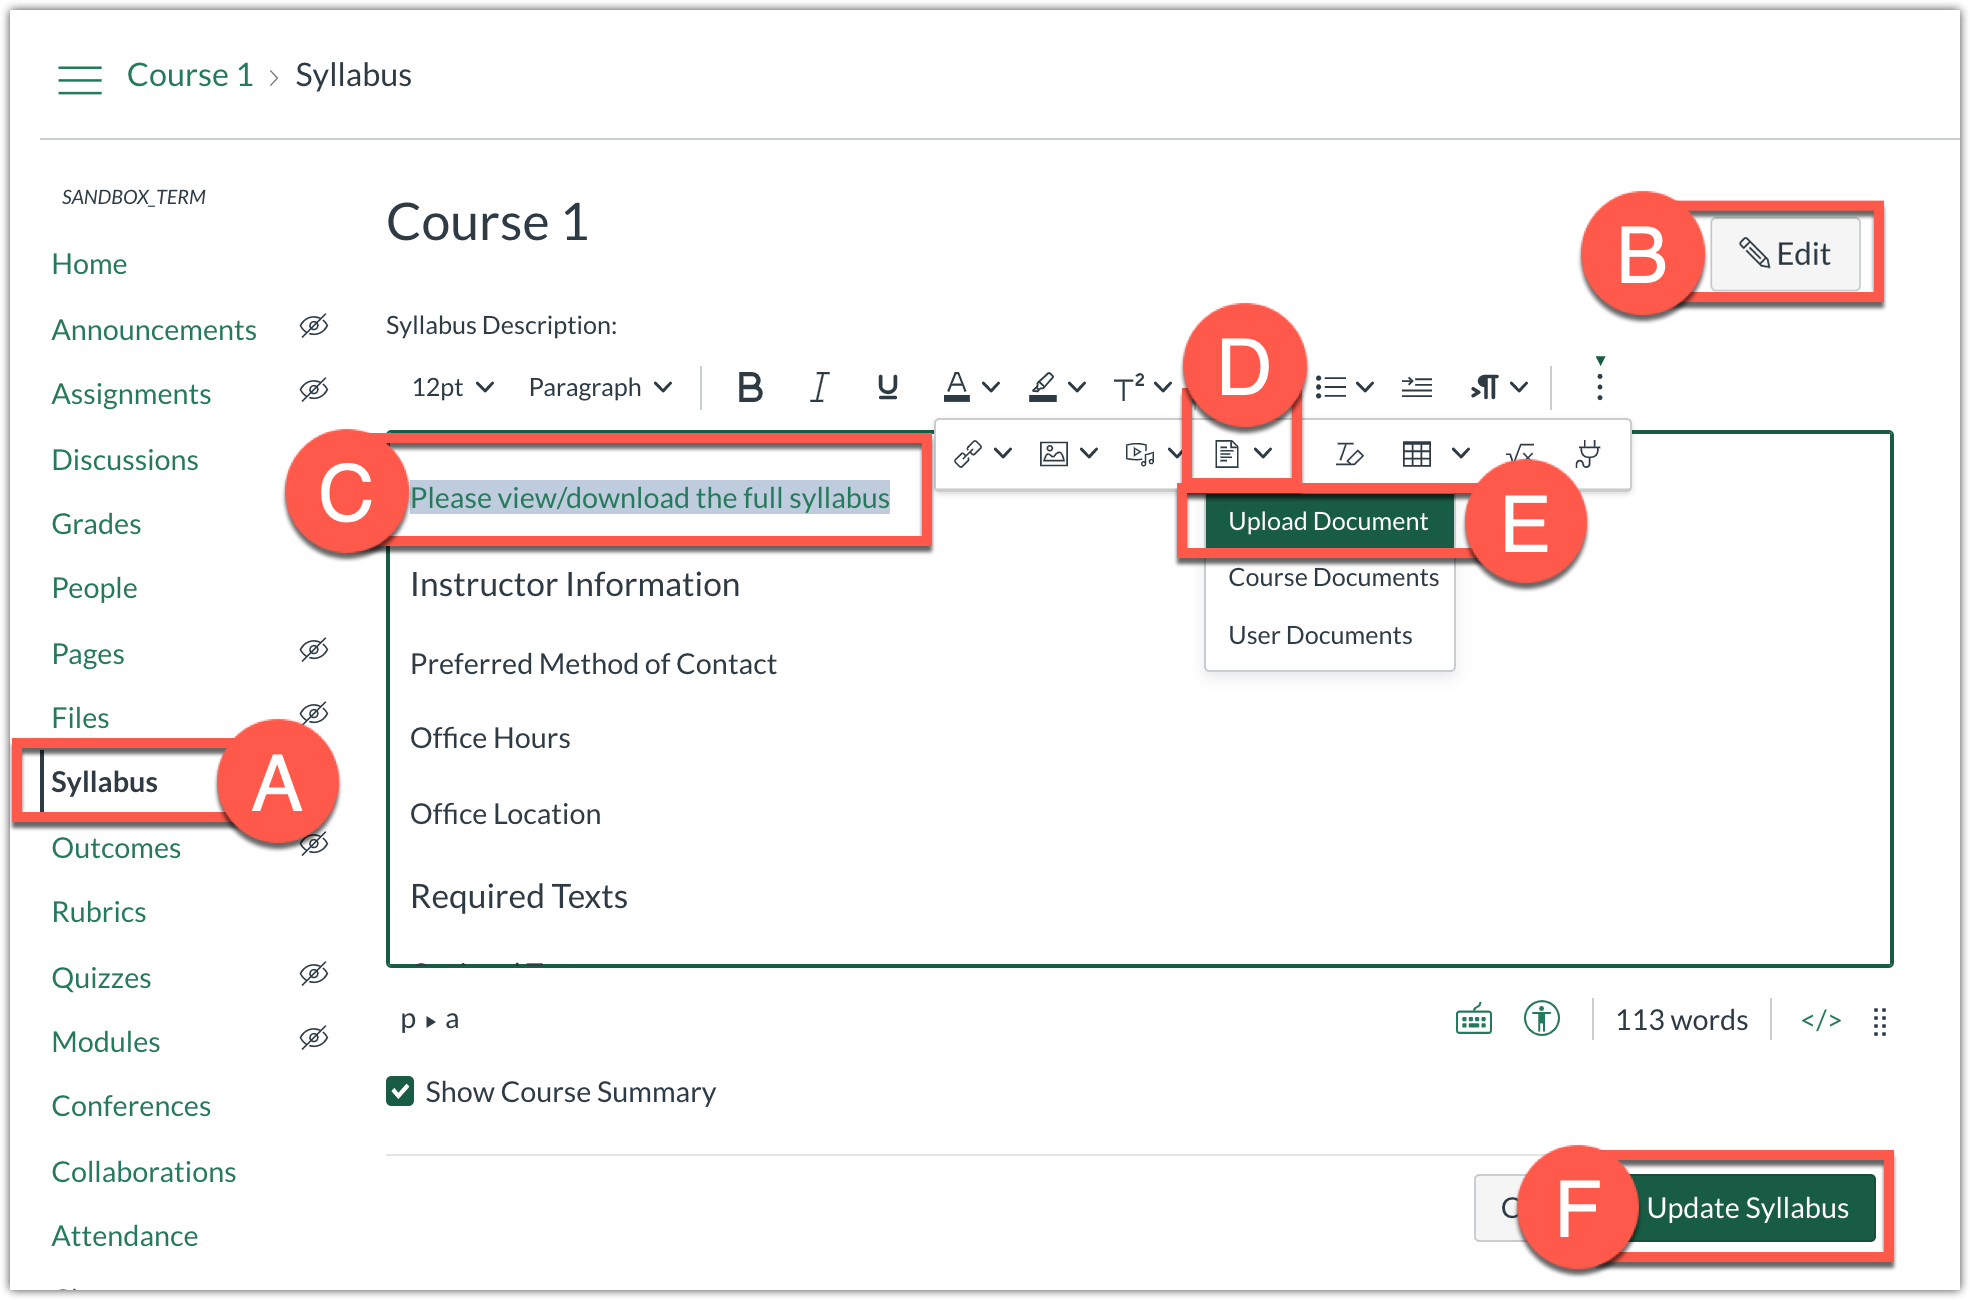
- Access course Syllabus (A) and click Edit (B) on the top right if you have not already done so.
- Type the text you would like to hyperlink to the printable syllabus in the text box (ex. Please view/download the full syllabus) and select the text (C).
- Click on the Documents (D) icon and select Upload Document (E).
Note: Depending on the resolution of your screen, you may have to click the vertical 3 dots at the far right of the toolbar in order to see the documents icon. - A new window will appear. Click to browser and select a file or drag and drop the desired firl into the Upload File area. Click Submit at the bottom when the file is uploaded. The file will automatically link to the text that was highlighted.
- Click Update Syllabus (F) to save your changes.
Hyperlink to an Existing Course File
If you have already uploaded your syllabus document to your Canvas Course Files, you can hyperlink text to that document by following the instructions below.
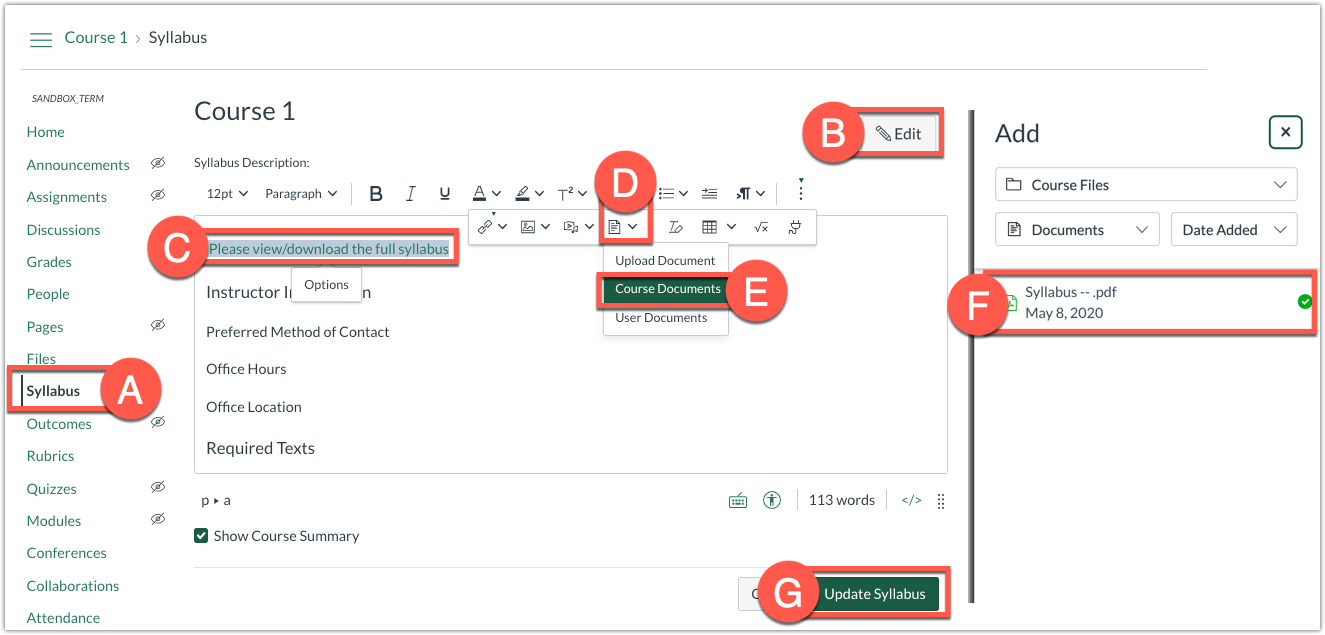
- Access the course Syllabus (A) and click Edit (B) on the top right if you have not already.
- Type the text you would like to hyperlink to the printable syllabus in the text box (ex. Please view/download the full syllabus) and select the text (C).
- Click on the Documents (D) icon and select Course Documents (E).
Note: Depending on the resolution of your screen, you may have to click the vertical 3 dots at the far right of the toolbar in order to see the documents icon. - Click the desired file from the list of files. The selected text in the text box will briefly display a yellow box around it. This indicates that the file was linked successfully.
- Click Update Syllabus (G) at the bottom to save your changes.
3 - Add Assignments with Due Dates
This portion of the Canvas Syllabus page is automatically populated when you add assignments, discussions, quizzes and events with due dates in your course. This is essentially what makes the syllabus dynamic as this portion will automatically change if you modify assignment dates during the semester.
- Create an assignment, quiz, or discussion in Canvas. Learn more about creating an assignment by visiting the Canvas Community web page.
- Select the desired settings for the assignment, such as point value, submission type, or other preferred assignment settings.
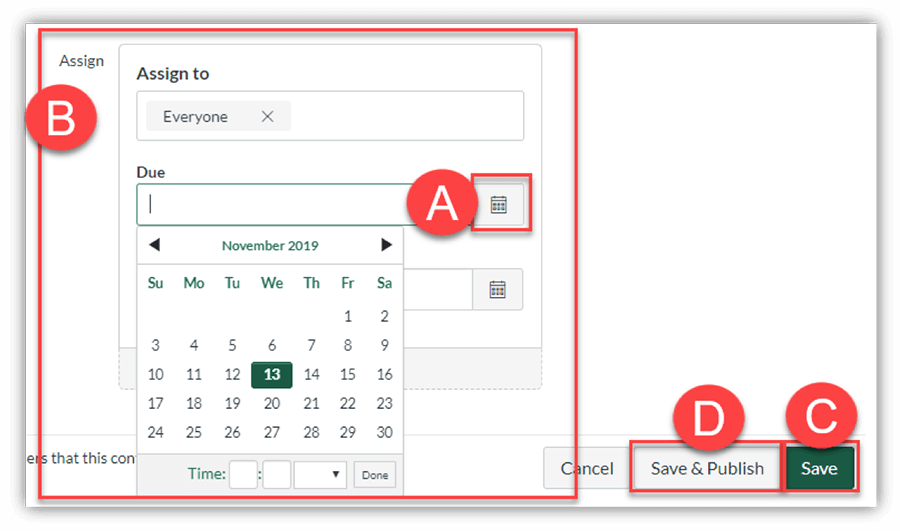
- To set a Due Date, scroll down to the bottom of the assignment settings page and click the Calendar (A) icon in the Assign to (B) card section.
- Select the date/time from the calendar that you would like for the assignment to be due.
- Click Save (C) or Save & Publish (D) at the bottom. This assignment and date will now display in the Course Summary section of your syllabus. Repeat this step for every assignment in your course.