On this Page:
Please follow the instructions to ensure successful completion of the registration process and gain access to your course. Click the links above to navigate to specific steps in this guide.
Step One: Select Course
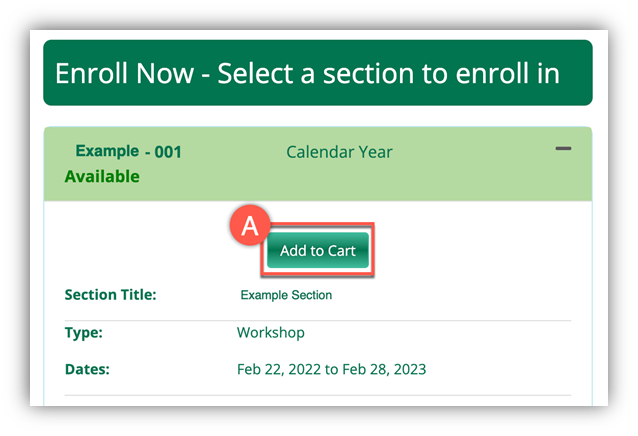
After accessing the Professional Studies website for your course, choose your course/section. The menu may include a list of courses or sections, or there may only be one.
- Click Add to Cart (A) to make your selection.
- When the popup window appears, click Checkout (B). Alternatively, click close to add additional sections to your cart before checking out.

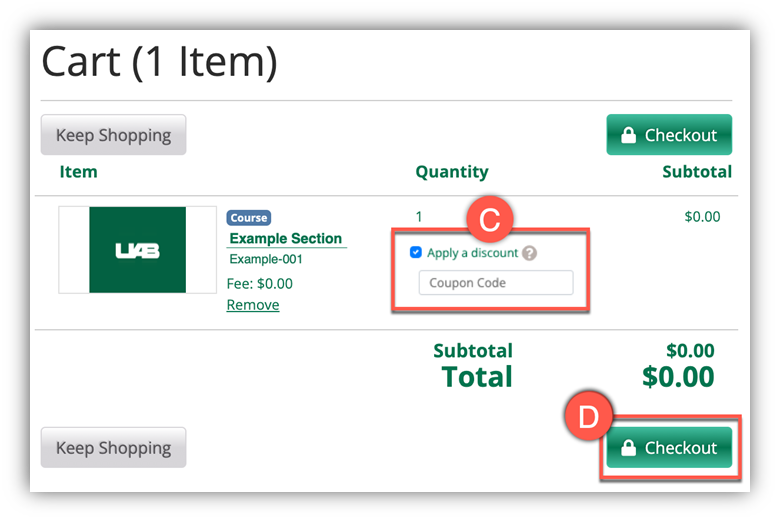
- If you have a discount coupon code, check the Apply a Discount (C) box, and type in the code.
- Click tab on your keyboard or click away from the area to see the discount applied.
- Click Checkout (D) to continue registering for this course.
Step Two: Create BlazerID/Log-in
When you register for a course, you will be required to have a BlazerID login credential. This serves as authentication in the Destiny enrollment platform and Canvas course learning management system only. It cannot be used for any other UAB services.
- If you already have a BlazerID, click Continue (A), sign in with your BlazerID and skip to Step 3: Complete Profile (skip to next section of guide).
OR
If you do not have a BlazerID, click Create Account (B) to begin.

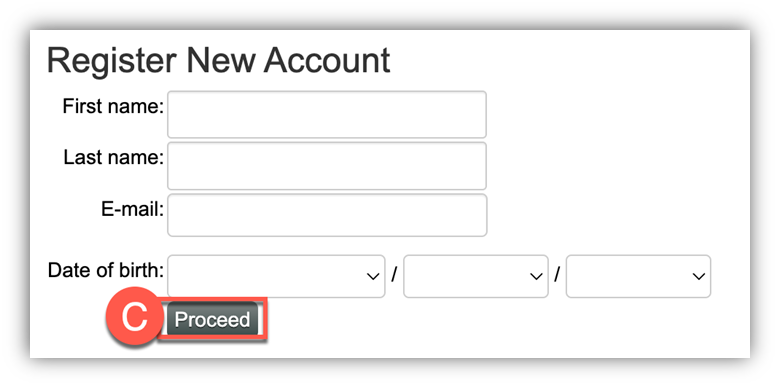
- Fill in the required information:
- First and Last name
- E-mail – Please make sure this email is typed accurately as important information is sent here
- Date of Birth
- Please check all fields for accuracy and click Proceed (C).
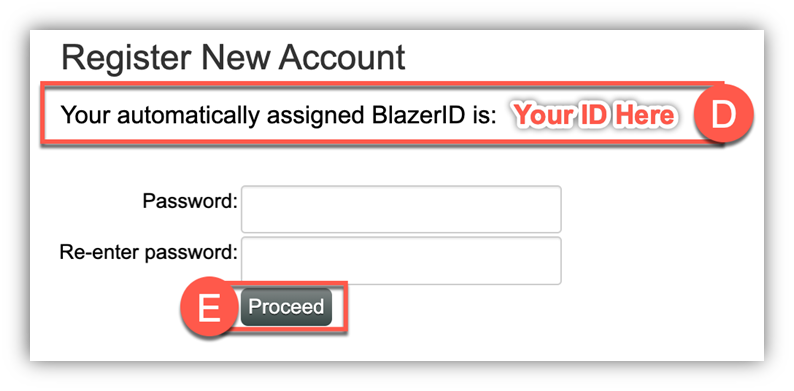
- Take note of your assigned BlazerID (D). You will need this information later.
- Follow the requirements presented on the page to create your strong password.
- Re-type the same password in to confirm.
- Click Proceed (E) to register your new account.
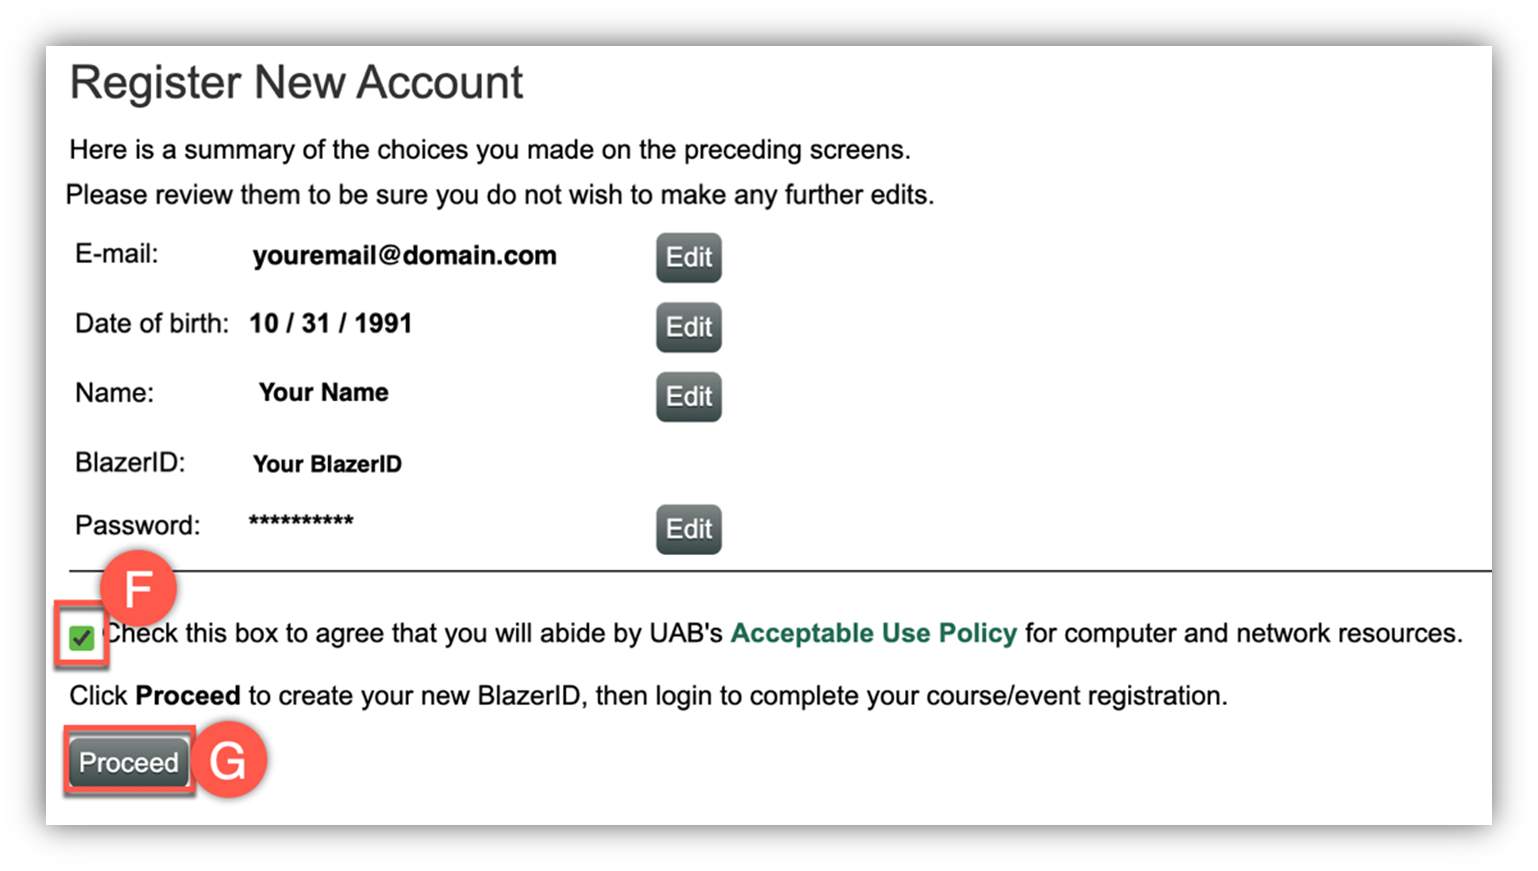
- Review your account information.
Note: Some browsers attempt to autofill information. Please check all fields for accuracy before proceeding.
- Click Edit beside any fields you desire to modify.
- Check the box (F) for UAB’s Acceptable Use Policy.
- Click Proceed (G) to continue creating your profile.
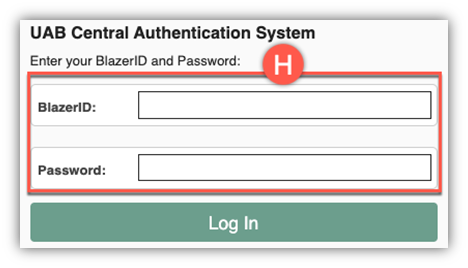
- This completes your creation of a BlazerID. The page will be directed to a log in screen. Sign in using your BlazerID and Password (H).
Step Three: Complete Profile Information
If you have taken a UAB Professional Studies course before, you can review your profile and edit any information that needs to be updated. If you are taking a UAB Professional Studies course for the first time, you will need to provide additional information to complete your profile.
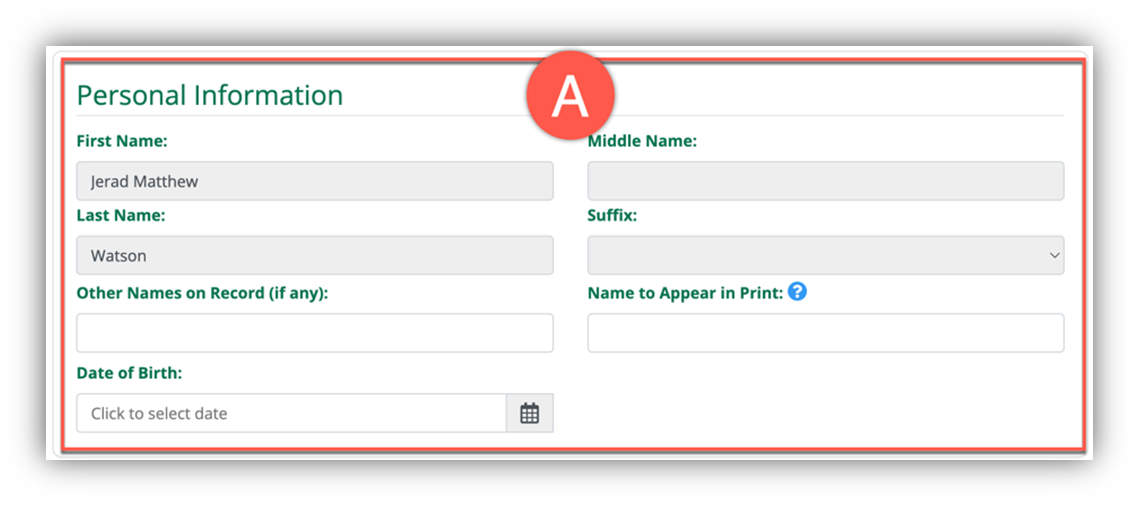
- Fill out your Personal Information (A).
Most of these fields are automatically filled in by your BlazerID account. Add other optional fields such as:- Salutation
- Other names on record (if any)
- Name to appear in print (would display on any certificates)
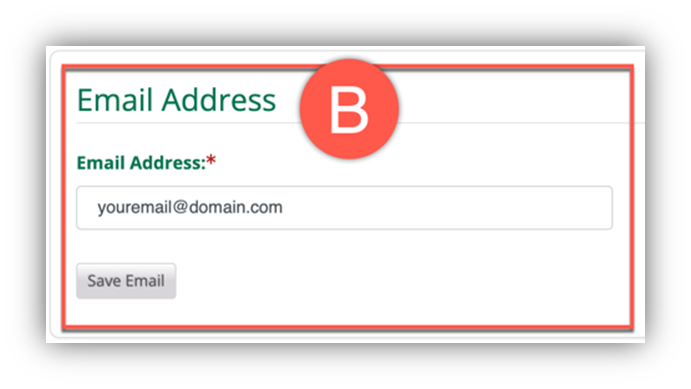
- Confirm your Email (B) is accurate. *This is a required field.
- Provide your Telephone (C) number. *This is a required field.
- Select the type of phone number (home, office, mobile)
- Area code
- 7 digit phone number

- Provide your Address (D). *This is a required field.
- Select the type of address (home, office, mobile)
- Address
- City
- State
- Country
- Zip Code

- Provide your communication preferences.
- Initial beside the Privacy Policies (E). *This is a required field.

- Click Continue Checkout (F).
- The next screen may contain custom questions.
- Provide answers to any required questions and click Continue Checkout again.
Step Four: Checkout
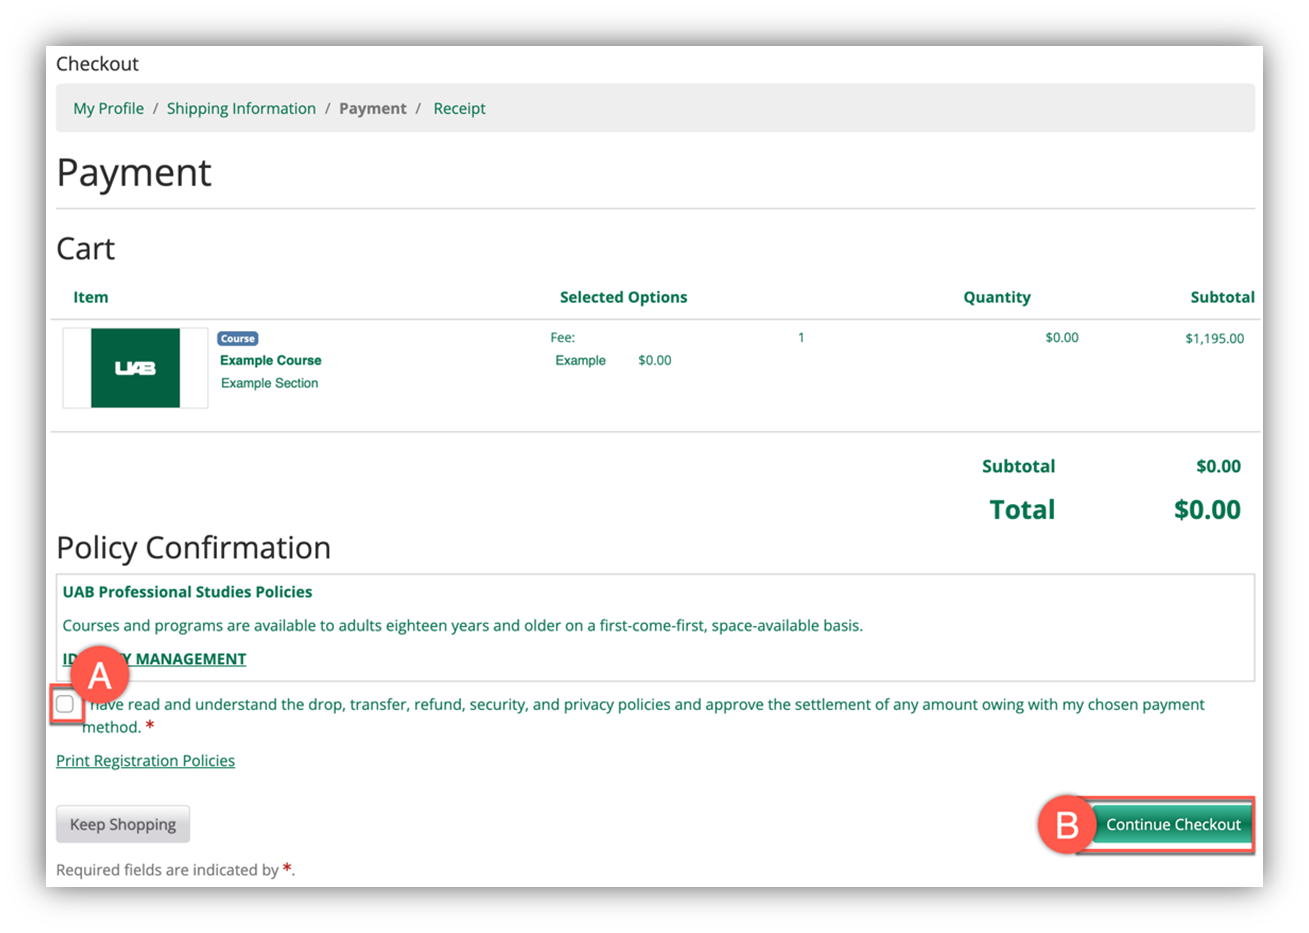
You now need to complete the payment portion of the checkout process. Some courses may have fees included.
- Click to agree (A) with the policies if this has not already been selected.
- Provide payment info if the course involves fees.
- Click Continue Checkout (B).
The final page in the registration process is your receipt.
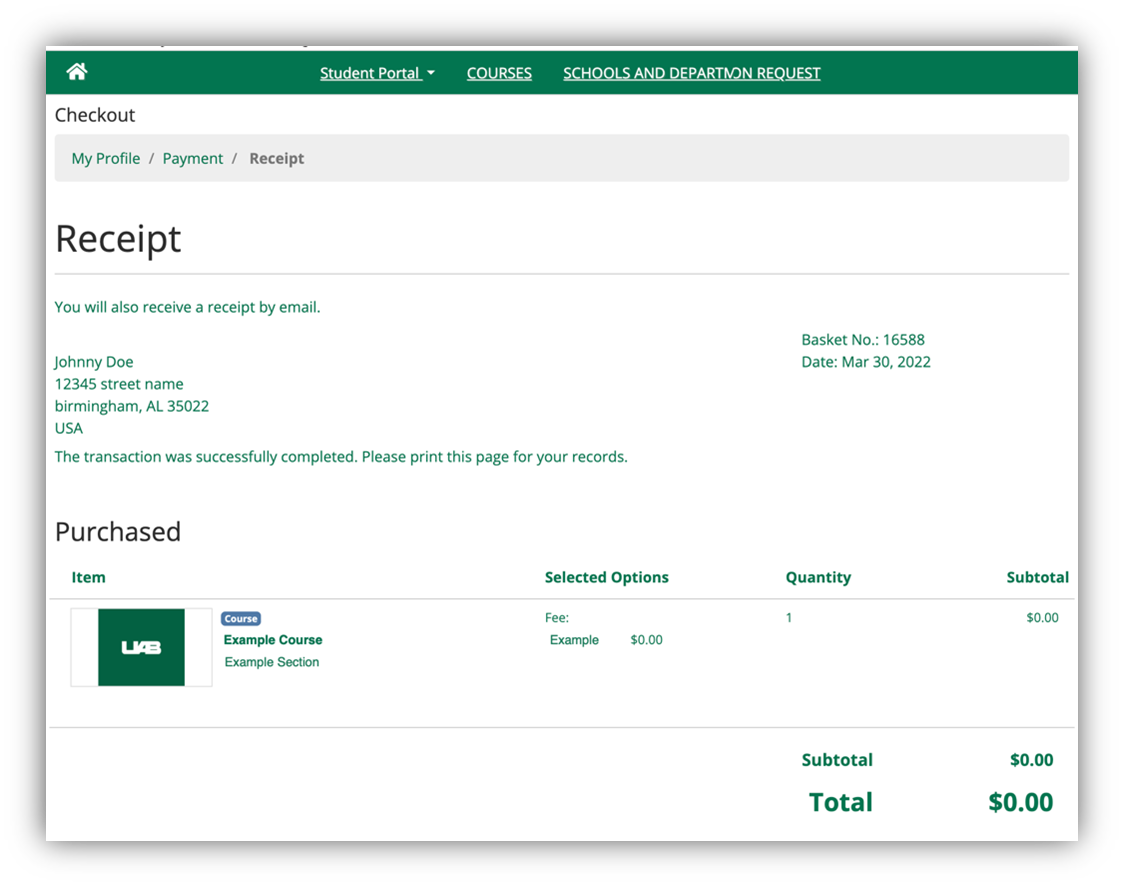
- Print or screenshot this page to keep for your records. You will also be emailed a receipt.
- Check your email for instructions on accessing your course.