Note for users of screen readers: Letters in parentheses in the instructions below refer to corresponding areas on example images. If you have any questions about these instructions, contact the Office of Learning Technologies for assistance opens a new website.
Embed Kaltura Media in Canvas
Embedding Media in Canvas allows instructors to place media content in places like Canvas Pages, Assignments, Discussions, Quizzes, and Announcements. This allows the media content to be more than a watch-only experience. Students can watch a video and have access to other information such as text, files, reflection questions, etc. Also, embedding media allows instructors to organize the media in the desired place in the course. Access can be restricted to keep students from seeing the video until a certain date/time or until certain tasks have been completed. Embedding can also allow students to download videos if instructors choose that option.
- Login to Canvas, click courses, choose a desired course, navigate to where you want to embed the media, and click edit to access the Rich Content Editor box. Options include Pages, Assignments, Discussions, Quizzes, Announcements, etc.
-
In the Rich Content Editor, My Media can accessed in two ways:
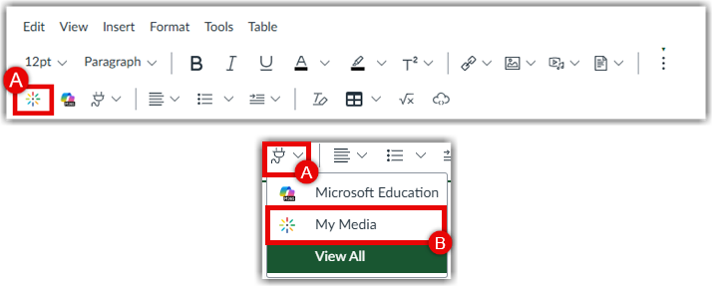
2.1. Place the cursor where you want the media to appear and directly click the My Media (A) icon from the toolbar if it is visible.
2.2. Click the Apps plug-in icon (A) from the toolbar to open the external tools menu. From the list of available tools, select Embed Kaltura Media / My Media (B).
Note: If the Apps icon is not visible, click the three-dot “More Options” menu on the far right of the Rich Content Editor toolbar to view additional tools. The Apps icon will appear, allowing you to continue embedding.
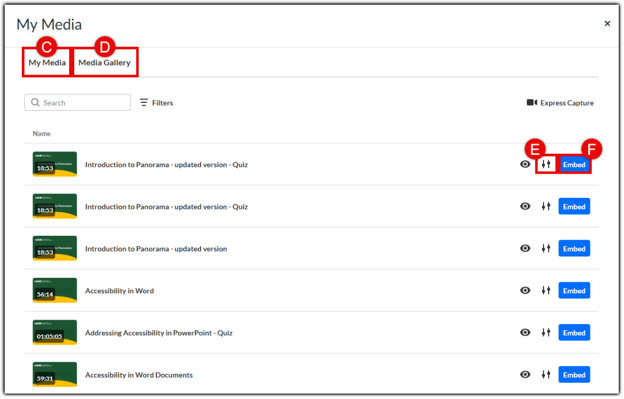
- After selecting the Kaltura tool, choose media from My Media (C) or Media Gallery (D). Once you find your media, click Embed (F) to insert it directly, or click Embed Settings (E) to customize options before embedding.
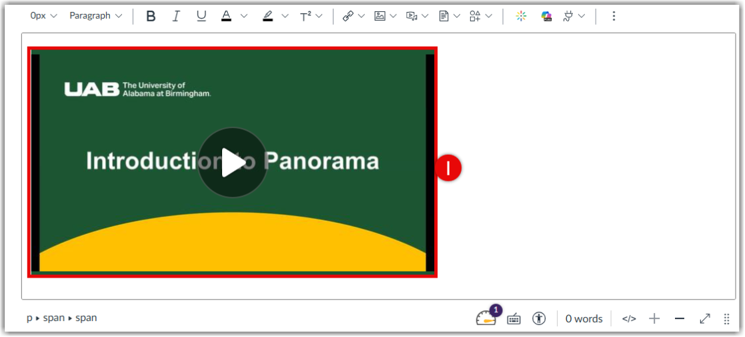
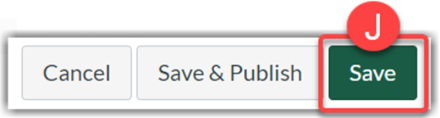
- The media embeds (I) into the text area. Click Save (J) at the bottom.
Embed Options
Users can customize a few options when embedding videos in Canvas.
- Follow the directions above to pull up embed options.
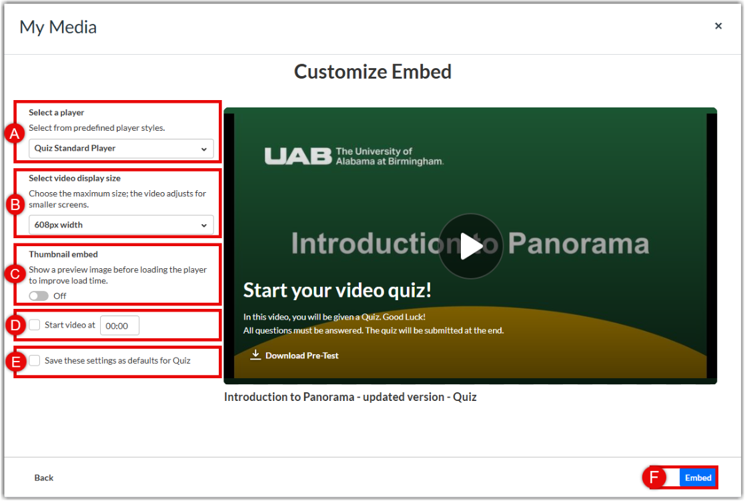
- Click on the Select a Player (A) dropdown menu and choose the desired player.
- Options include but are not limited to Standard Player and Player with Download Option, and Player with Transcript widget.
- Click on the Select video display size (B) dropdown menu to choose the size of the media.
- Options include 608px, 800px, and 1100px.
- Turn either Thumbnail Embed (C) or Auto Play (D) On/Off.
- Thumbnail Embed – Loads a thumbnail instead of the player for faster loading. Clicking the thumbnail starts playback automatically. Recommended for pages with multiple Kaltura players to reduce loading time.
- Auto Play – Set this to start playing the video automatically when the page is visited. Set the Start Time if desired. This option is not recommended for most Canvas courses.
- Users playing the video will start watching the video according to the time you set. Note: Users will be able to watch the rest of the video. For a more restrictive playback, create a clip of the video.
- Click the Set as Default Settings (E) checkbox if desired. Use this check box to make these settings your new default. Once set for a media type, you will not need to enter the embed settings again for this type of media. You can simply click embed.
- Click Embed (F) and save.
Publishing Media to Media Gallery
Publishing Media to the course Media Gallery organizes course media in one place, allowing students to search and filter content. Instructors can publish multiple videos at once.
Enable Media Gallery
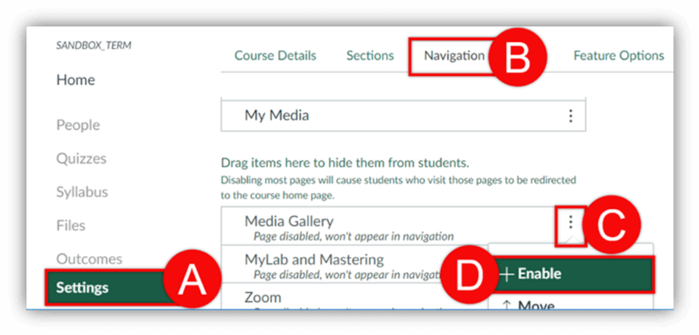
- In course navigation, go to Settings (A) > Navigation (B) tab.
- Click the three dots (C) next to Media Gallery, choose Enable (D), and click Save.
Publish to Course Media Gallery
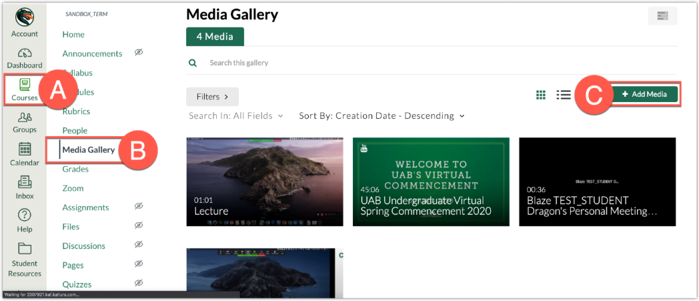
- Login to Canvas, click Courses (A), choose a desired course, and click Media Gallery (B) in the course navigation.
- Click + Add Media (C).
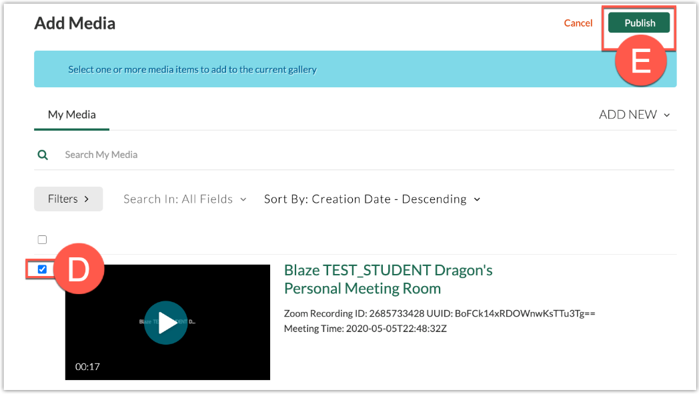
- Check the box(es) (D) to the left of the video(s) you would like to publish and then click Publish (E) at the top right.
- Media can be accessed by all users in the course by selecting Media Gallery in the course navigation of the course where the media has been published.
Edit Media Gallery Settings
Course Instructors and/or Designers have access to edit the Media Gallery settings. Watch the tutorial video or follow the instructions below.
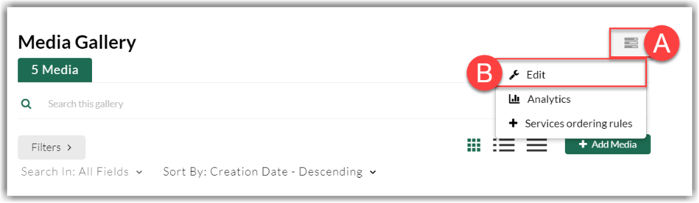
- From the course Media Gallery, click the Channel Actions (A) button at the top right, then select Edit (B).
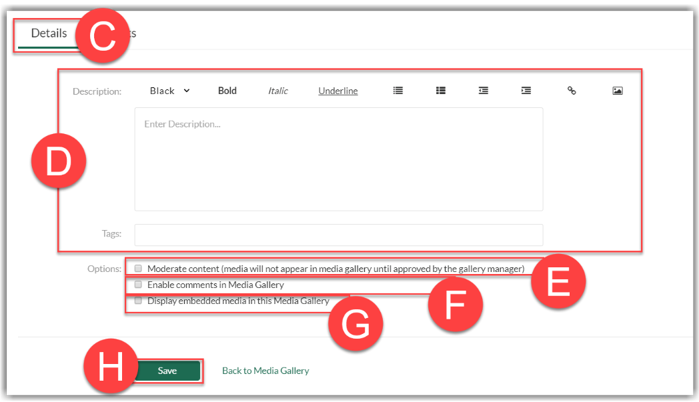
- Click the Details tab (C) to access the Media Gallery settings.
- Descriptions and Tags (D) can be edited or inserted for searching purposes.
- Check the Moderate Content checkbox (E) to keep students from publishing media into this gallery without your approval.
- Check the Enable Comments checkbox (F) to allow commenting below media.
- Check the Display Embedded Media checkbox (G) to have Kaltura automatically post media to the media gallery once you embed it somewhere in the course.
- Click Save (H) to save any changes made.
Creating a Playlist
Instructors wanting to control the order of media in the Media Gallery can create one or more playlists and organize the media as desired. Follow the directions below to create a playlist.
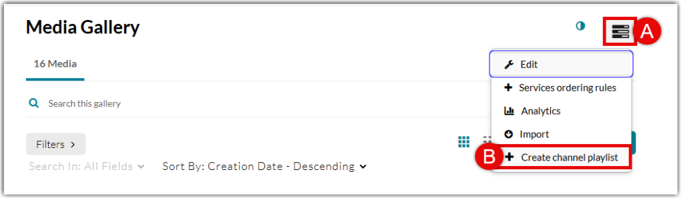
- Access Media Gallery in your Canvas course, click the Menu icon (A) at the top right, and select Create channel playlist (B).
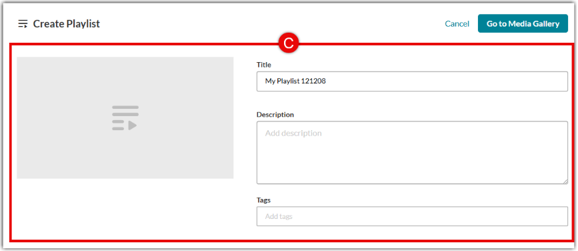
- Enter your playlist details, such as the Title, Description, and Tags (C).
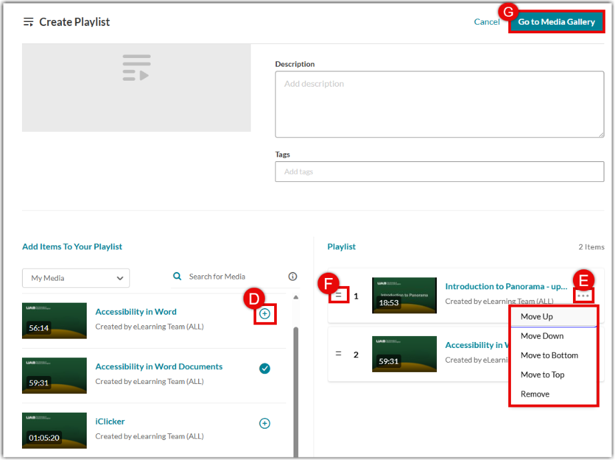
- Under Add Items To Your Playlist, click the Add (+) button (D) next to any item you want to include. Added items will appear in the Playlist section on the right.
- To re-order items manually, click and drag the Re-Order icon (F), or click the Three Dots menu (E) on an item to select options such as Move Up, Move Down, or Remove.
- When finished, click Go to Media Gallery (G) at the top right to save your playlist and exit.
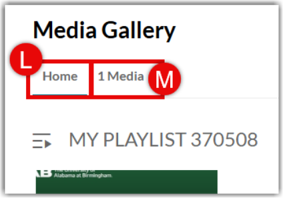
- The Home page (L) of the Media Gallery will display the playlist you created. Students can click the tab with Media (M) to show all media in the Media Gallery.