Canvas Media should be replaced with Kaltura embeds or Media Gallery videos for better accessibility. Download the Canvas Media file, upload it to Kaltura, and replace the Canvas Media embed or link with a Kaltura embed or link in Canvas.
Note for users of screen readers: Letters in parentheses in the instructions below refer to corresponding areas on example images. If you have any questions about these instructions, contact the Office of Learning Technologies for assistance opens a new website.
Canvas Media in your course will have this distinct look:
All published Canvas Media should be migrated to Kaltura for better Title II compliance.
Start with the first item in the first module, click ‘Next’, and review each published module item while replacing Canvas Media.
Canvas Media can be added through a Module link or a Rich Content Editor (RCE) link/embed. The replacement method depends on how the media was added.
If the Canvas Media shows a filename with a video extension (.mp4, .webm, .mov, etc.) and a Download option, it is a linked module item. If not, it is an RCE embed. Proceed to the RCE section for this embed type.
Linked Module Item
- Download the video file and log the filename with all other Canvas Media filenames in the course. The names will be needed at the end of this process.
- Upload the file to My Media. Machine captions will automatically be created
-
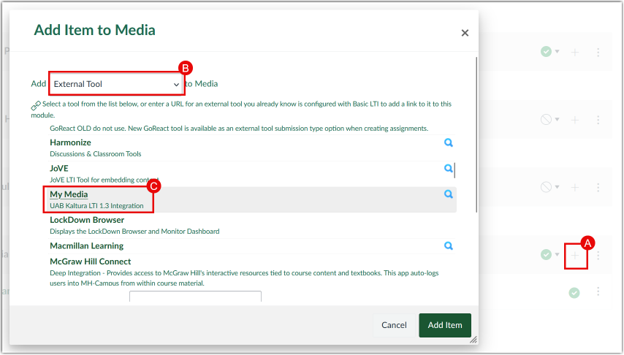
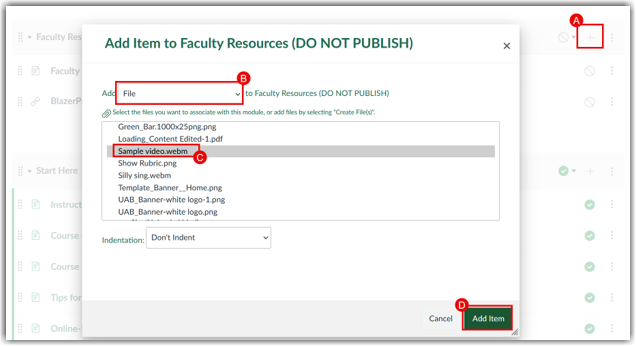
Return to Modules and add the Kaltura video. Open the module with the Canvas Media item, click the plus sign (A), select External Tool (B), and choose My Media (C).
-
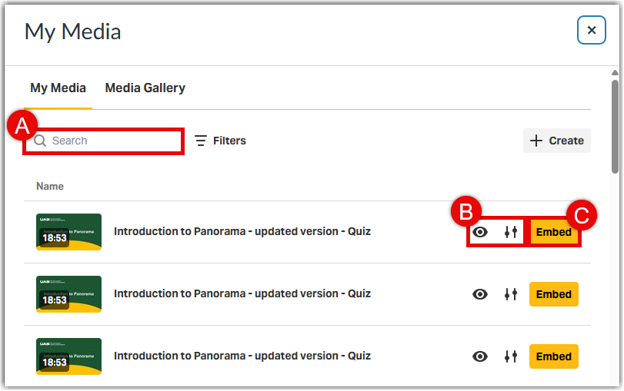
A list of Kaltura Media will appear, with newly added media at the top. Search by title (A), adjust embed options in Settings (B), then select </> Embed (B) and Add Item (C).
-
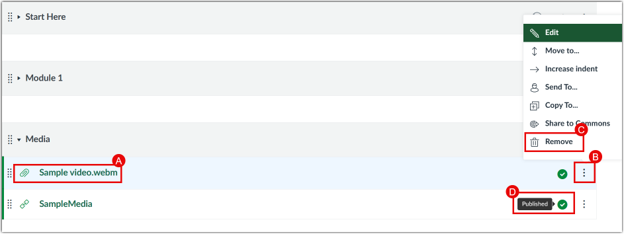
Return to Modules, remove the Canvas Media item with the paperclip icon (A) and file extension by opening the vertical kabob (B) and selecting Remove (C). Publish the Kaltura video copy (D).
- Review all published Modules for Canvas Media, log filenames, and convert them to Kaltura. Then proceed to Cleanup with the file list.
Rich Content Editor (RCE) Embeds
-
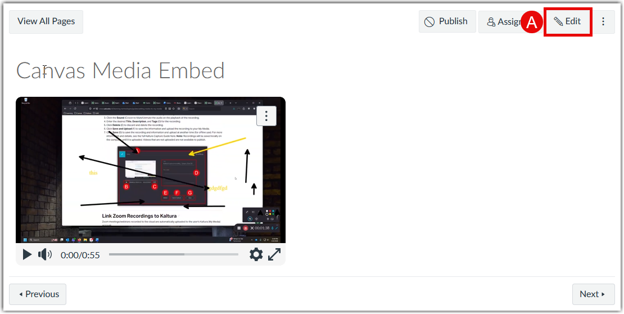
To identify the name of the Canvas Media file that was embedded in a page with the RCE, first open the page in the RCE by clicking Edit (A).
-
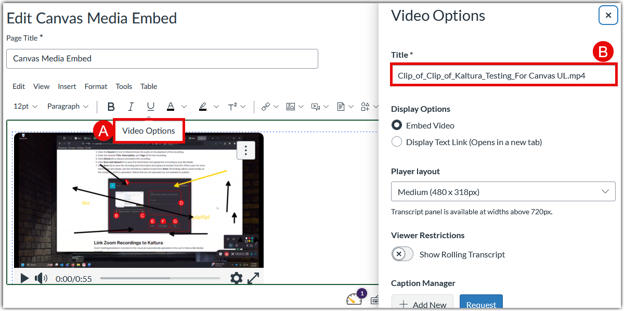
Locate the video on the page and click anywhere on it except for the play button. A Video Options tab will appear (A). Click on the tab and copy the name of the media from the title field (B).
-
Upload the file to My Media. Machine captions will automatically be created.
-
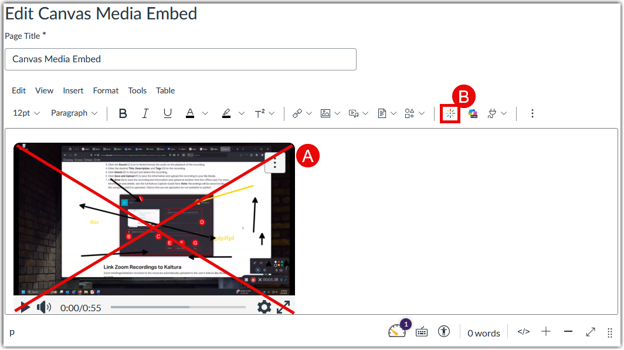
Edit the page with the embedded Canvas Media, delete the old media (A), and click the Kaltura Media logo in the RCE (B) to add the Kaltura version.
-
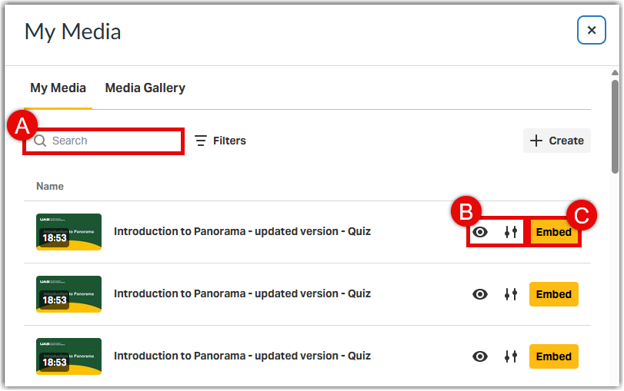
A list of Kaltura Media will appear with newly added media at the top. Search by title (A), adjust options in Settings (B), and select </> Embed (C) to add the captioned Kaltura media.
Clean Up
-
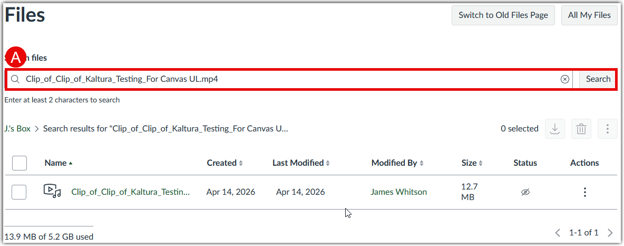
With a list of Canvas Media filenames from the course at hand, return to the Files section of your course. Search for the old Canvas Media by filename (A).
-
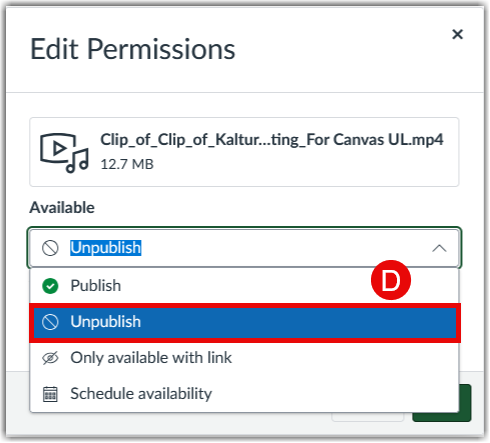
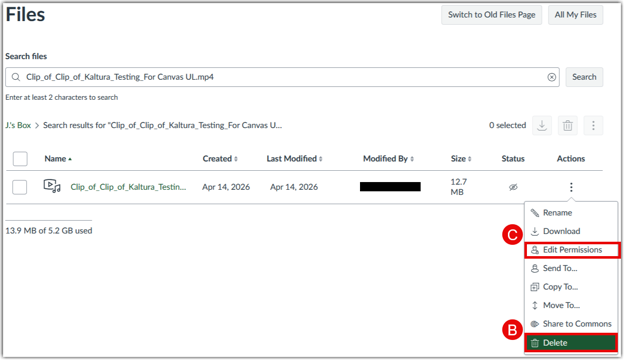
Use the three dot dropdown menu to either or Delete (B) or Edit Permissions (C). Use the dropdown menu in the window that opens if you wish to Unpublish(D) the media.
-
You may also select multiple files to Delete or Unpublish the old Canvas Media in bulk.