Note for users of screen readers: letters in parentheses in the instructions below refer to corresponding areas on example images. If you have any questions about these instructions, contact eLearning for assistance.
- Select Microsoft Education from the course Navigation menu (A). Select Meetings (B), then click Join for the meeting you wish to attend (C).
- You may be asked to sign in with your Microsoft account. If prompted, click Sign In, enter your UAB email address, and you will be redirected to the UAB sign-in page.

- The Teams App will open. (You may have to select or give permission for Teams to open).
Tip: If you do not have the Teams app installed, another browser window will open asking you if you would like to continue in the browser or download the app. UAB eLearning recommends downloading, installing and using the Teams app for the best possible experience. - Once the Teams app is open, configure your meeting options and join the meeting.
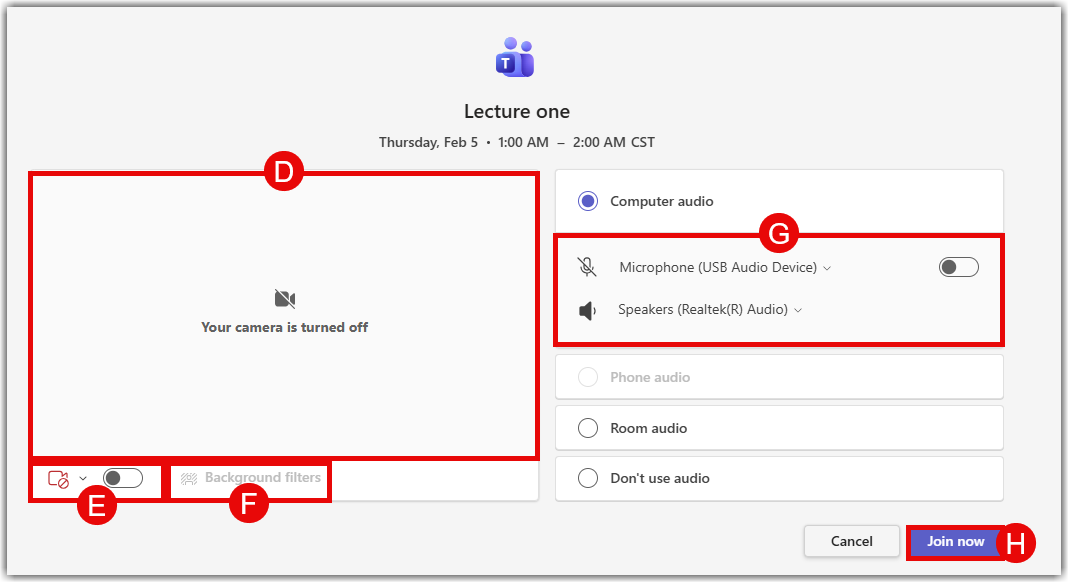
- Your picture as seen by the camera will appear (D).
- Toggle your camera on or off with (E).
- Choose a background filter (if desired) from the menu (F).
- Choose for your microphone to be on or off with (G).
- To join the meeting, press Join Now (H).
- For more information on Teams Meetings controls and features visit Microsoft’s Support Webpage.
Note for users of screen readers: letters in parentheses in the instructions below refer to corresponding areas on example images. If you have any questions about these instructions, contact OLT for assistance.
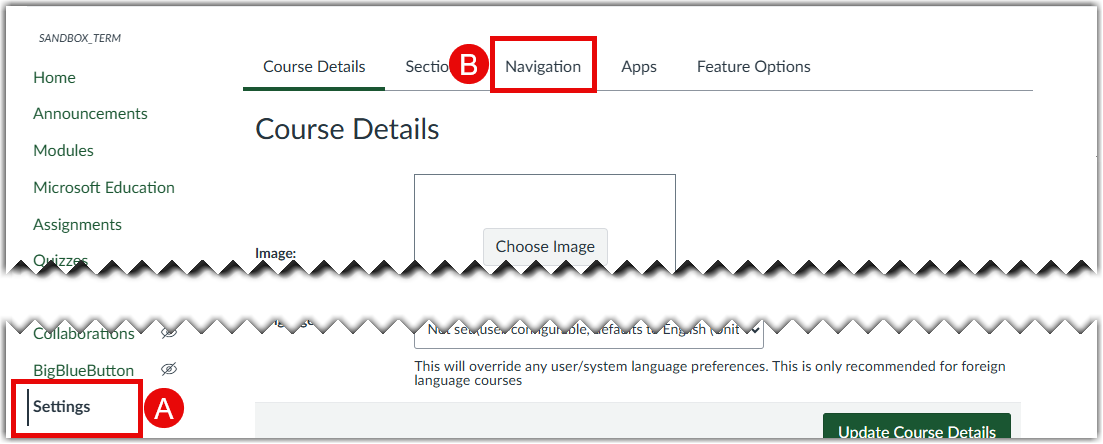
- Select Settings (A) from the course navigation list, then click the Navigation (B) tab to ensure Microsoft Education is enabled for your course.

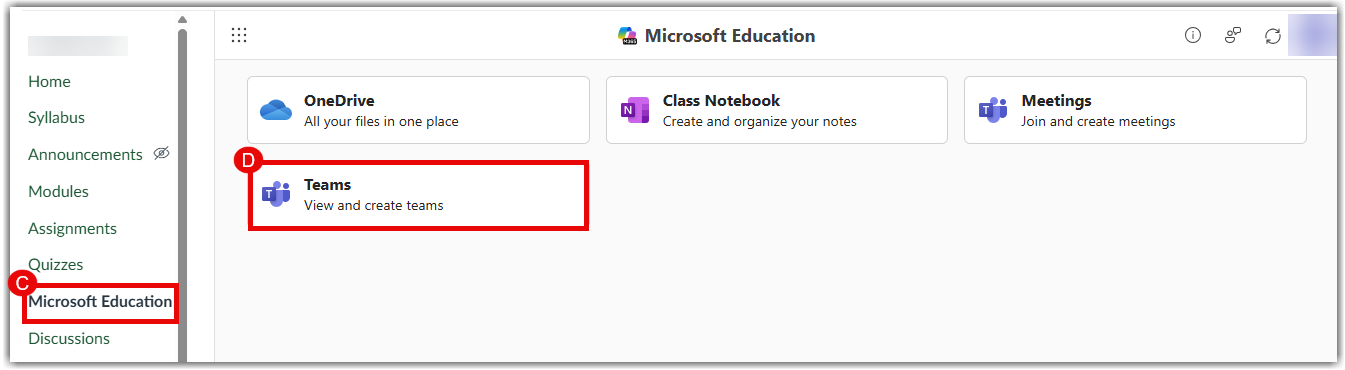
- Select Microsoft Education (C) from the course navigation list. Click the Teams tile (D) to view and create teams for your course.
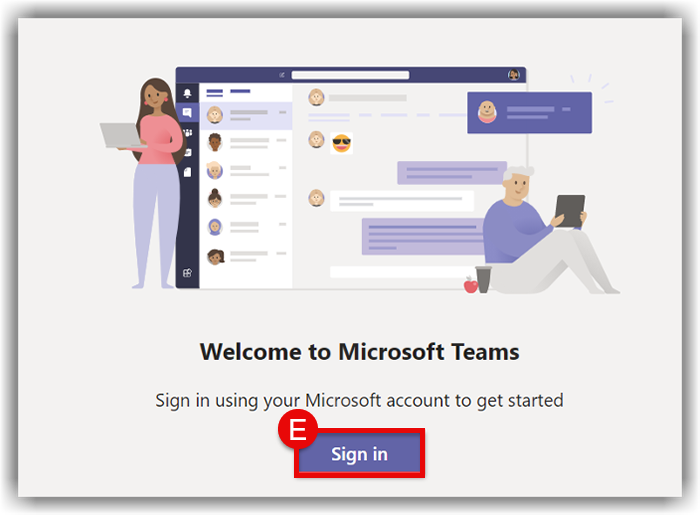
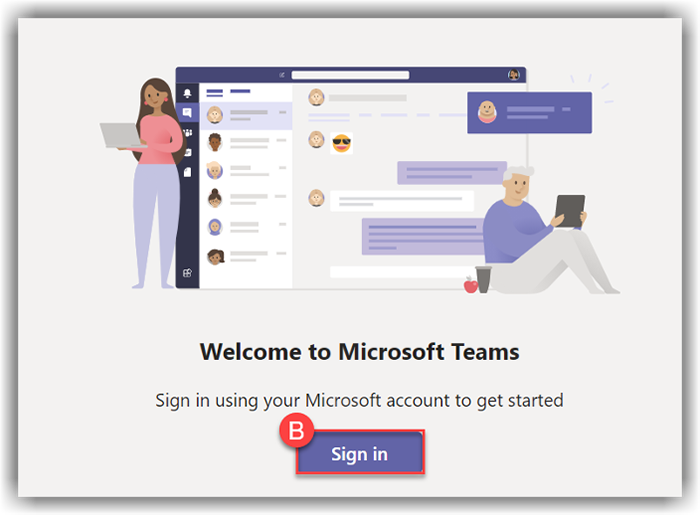
- You may be asked to sign in with your Microsoft Account. If you see this screen, click Sign In (E). Sign in with your UAB email address; you will then be redirected to the UAB sign-in.
- On the Microsoft Education (F) page, find your course card and click Open
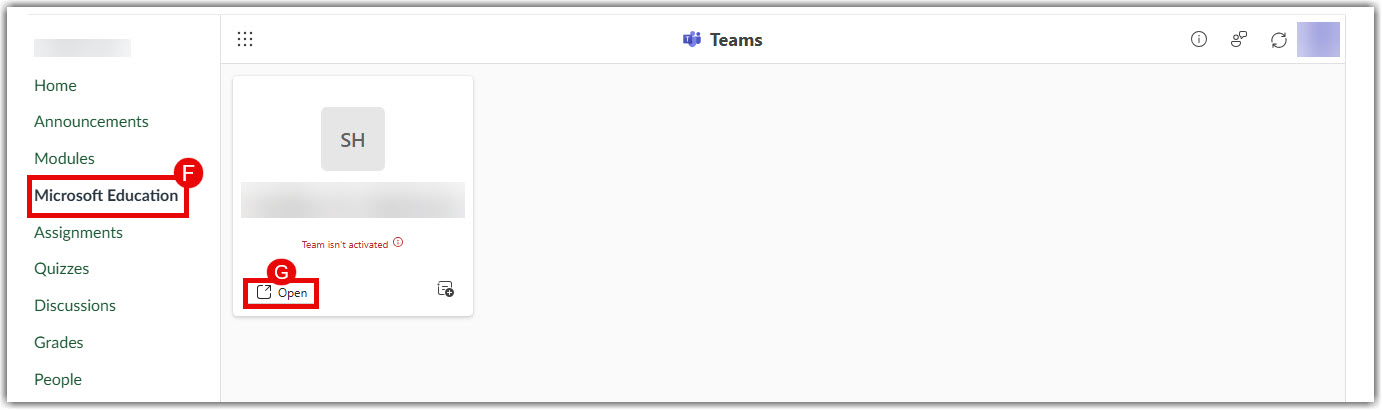
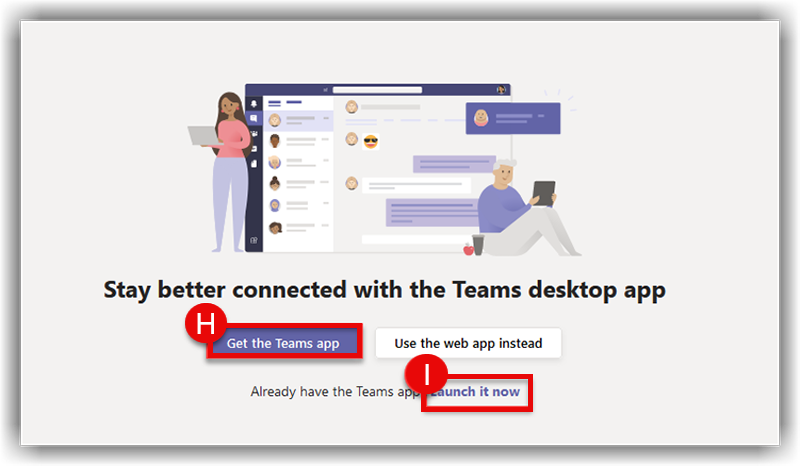
- Another browser tab will open. If you do not have the microsoft teams app installed, click Get the Teams app (H) and follow the instructions to install it. If you already have it installed, click Launch it now (I).
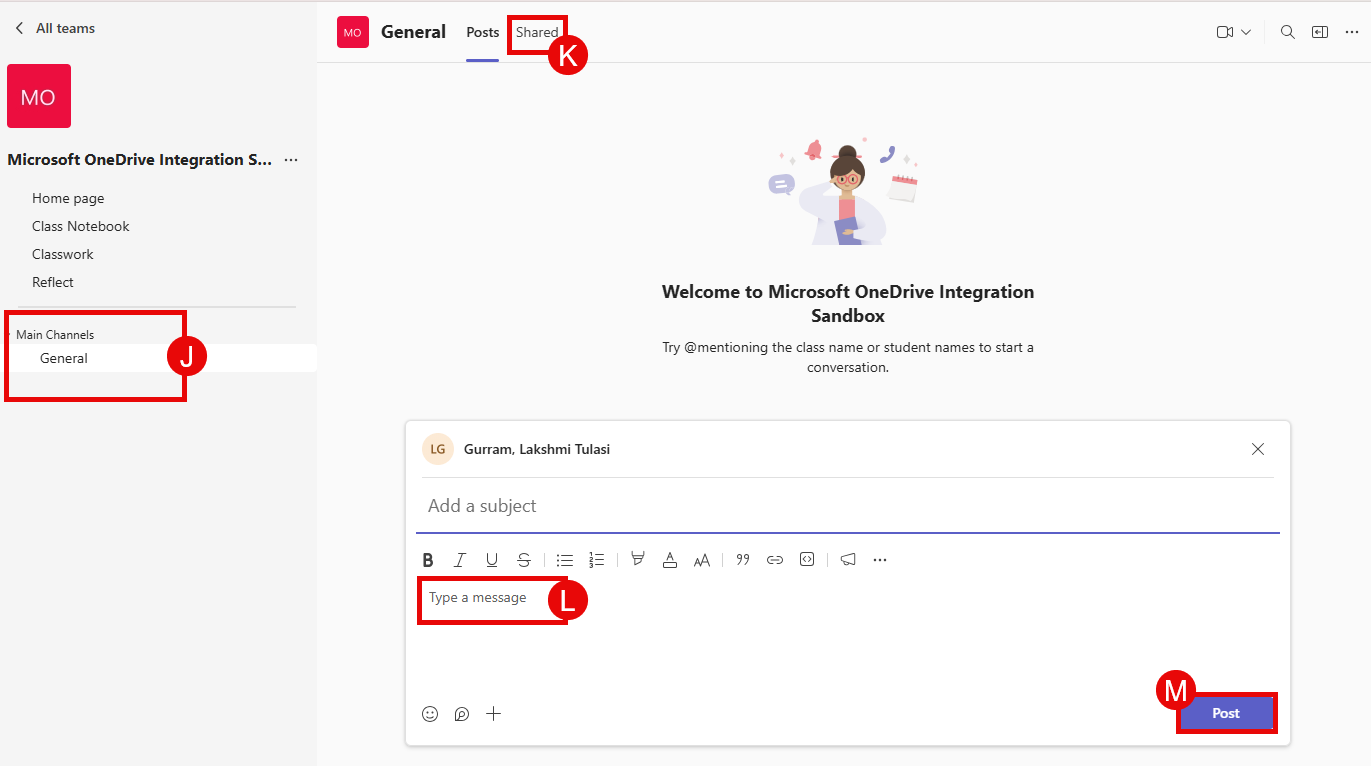
- In your Microsoft Teams Class, a welcome message for your course will appear in the center of the screen.
- Access the General Channel (F) or any other channels listed under the Main Channels section on the left.
- Access and upload resources using the Shared (K) tab located at the top.
- Type a message (L) to start or reply to a conversation.
- Click Post (M) to send your message to the class.
- Access additional guides and information on Microsoft’s Support Webpage.
Note for users of screen readers: letters in parentheses in the instructions below refer to corresponding areas on example images. If you have any questions about these instructions, contact eLearning for assistance.
Step 1: Enable Microsoft Education
To use Microsoft Teams Meetings, Microsoft Education must be enabled in that course. This must be done in each course where you would like to use Microsoft Teams Meetings integration.
Note: If Microsoft Education is already enabled in your course for Teams Meetings, skip to the next step.
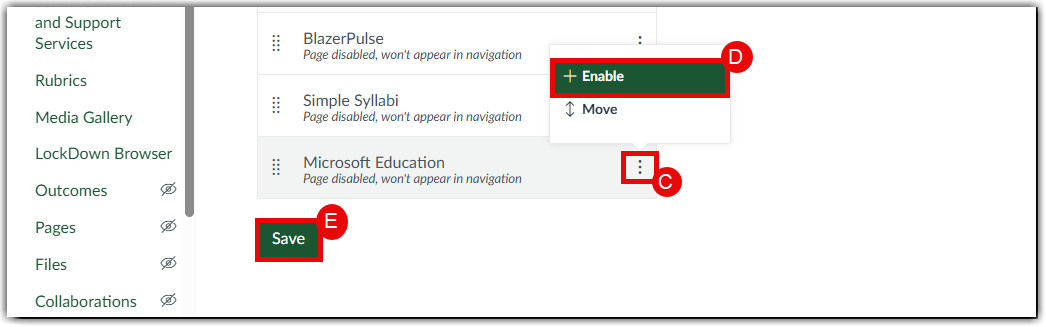
- Go to Settings (A) in your Canvas course and select Navigation (B).
- Scroll down to the bottom of the Navigation tab until Microsoft Education is visible. Click the Three vertical dots (C) beside Microsoft Education, then click +Enable (D), and Save (E).
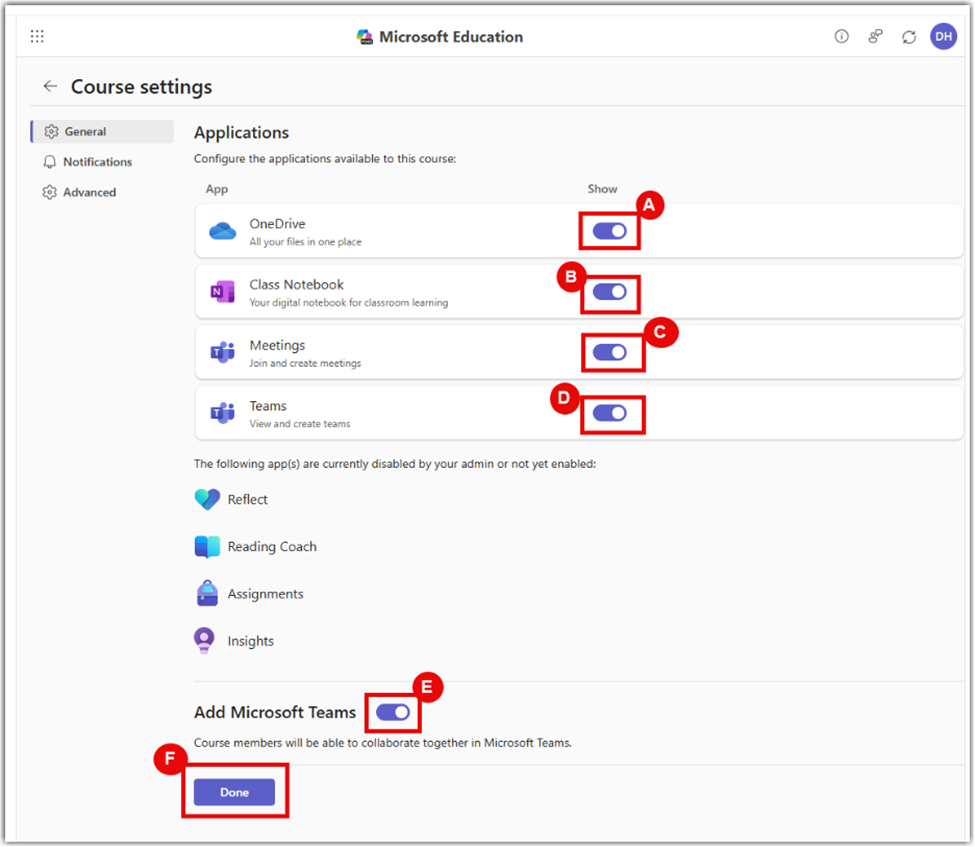
- Select Microsoft Education (A), then click your Profile Icon (B) and select Course Settings (C).
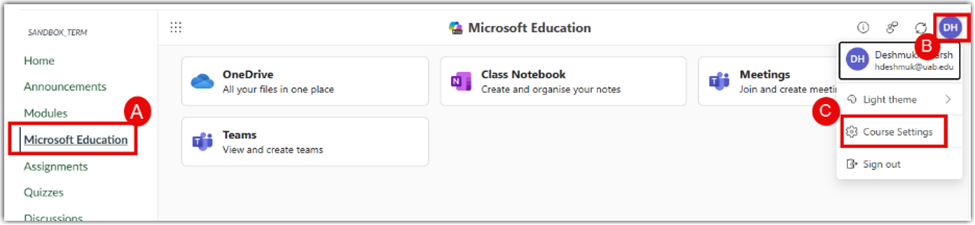
- Make sure Teams (D) and Add Microsoft Teams (E) are enabled along with any other features you need, then press Done (F).
Step 2: Access Microsoft Teams Meetings
The next step is to add Teams Meetings to your Course Navigation.
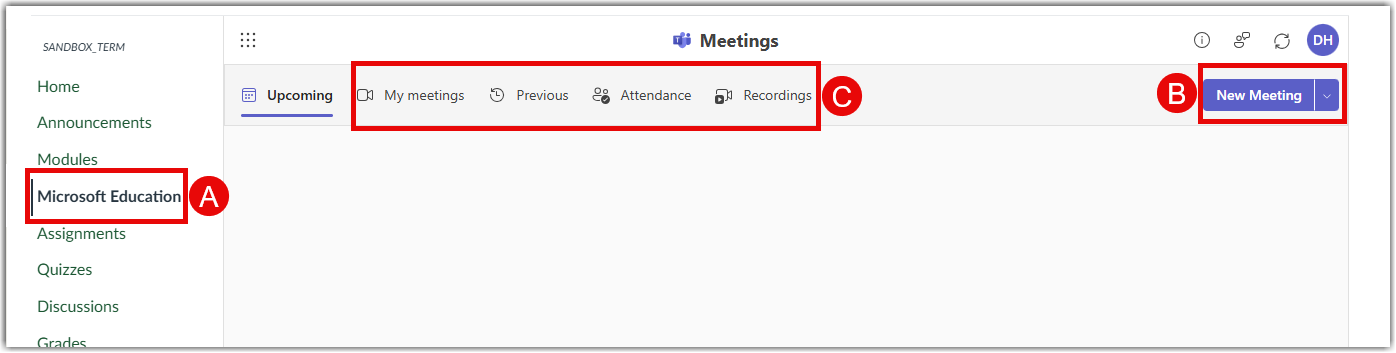
- Now that Microsoft Teams Meetings have been enabled, select Meetings (B) from the Microsoft Education (A) Dashboard.

- You may be asked to sign in with your Microsoft Account. If you see this screen, click Sign In (B) and log in with your UAB email address.
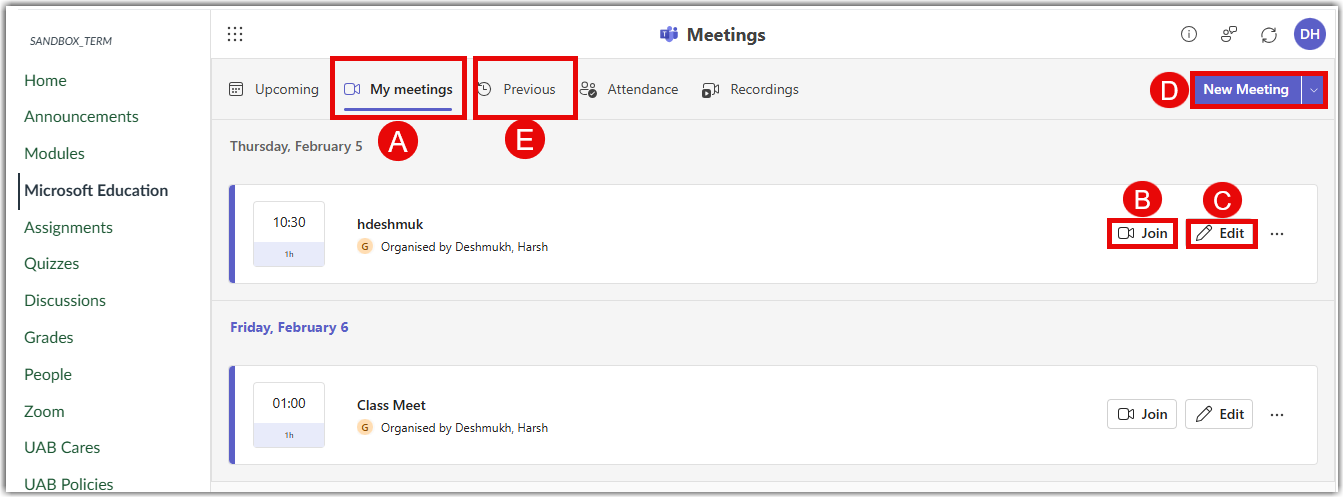
- To schedule a new meeting, click + New Meeting (B). You can browse through Previous Meetings, Attendance, and Recordings in Options (C).
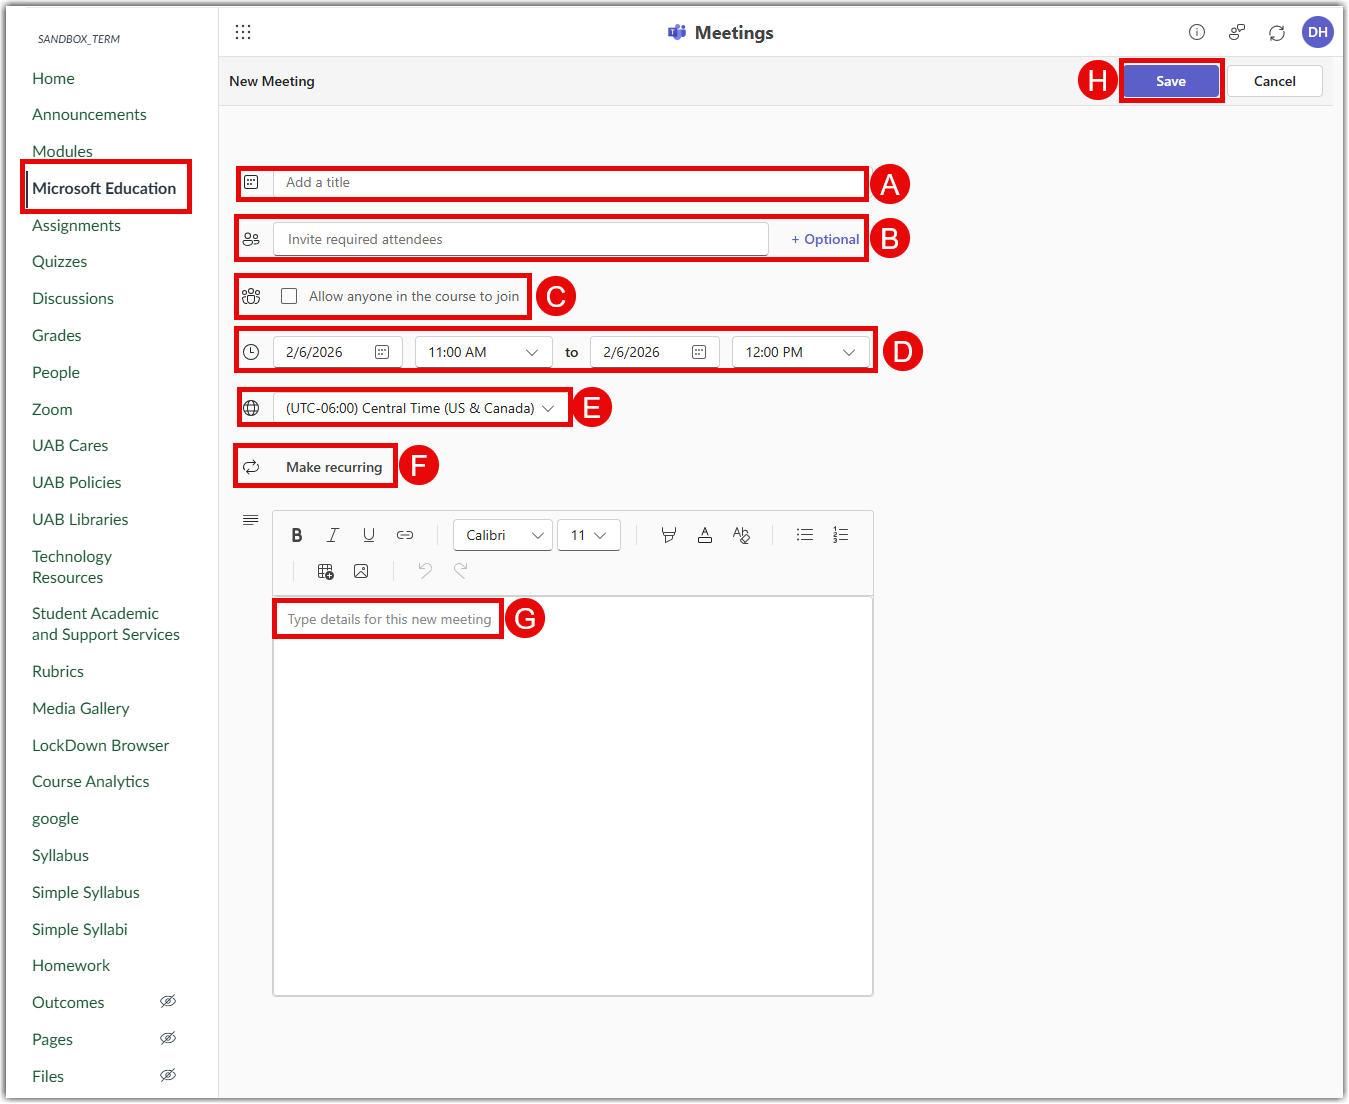
- In the New Meeting window complete the following details:
- Add a Title (A)
- Select attendees – Invite Required Attendees (B) will invite everyone in the class
- To keep the meeting unrestricted, select Allow anyone to join (C)
- Set the start time and date using the Date and Time dropdowns (D)
- Set the end time using the same dropdowns (D)
- Make the meeting recurring if needed using Make Recurring (F)
- Add Location (K) and meeting details (L) if desired
- Click Save (M) when finished
- Once scheduled, meetings will appear in the My Meetings (A) tab. Click Join (B) to start, Edit (C) to modify, or New Meeting (D) to create another. Use the month dropdown to view other dates (E).
- Access additional guides and information on the Microsoft Support Webpage.
Note for users of screen readers: letters in parentheses in the instructions below refer to corresponding areas on example images. If you have any questions about these instructions, contact eLearning for assistance.
Step 1: Enable Sync and Create Teams Class
To create your Teams Class first you must turn on Microsoft Sync and start Microsoft Sync in Canvas to set up the feature. This must be done in each course that you would like to use Microsoft Class Teams integration.