Instructors and students can now choose their own adventure with Kaltura Media by creating, embedding, and sharing video paths that will increase engagement, enhance learning, and boost conversion.
Note for users of screen readers: Letters in parentheses in the instructions below refer to corresponding areas on example images. If you have any questions about these instructions, contact the Office of Learning Technologies for assistance opens a new website.
Creating an Interactive Video
Access My Media
- Access My Media.
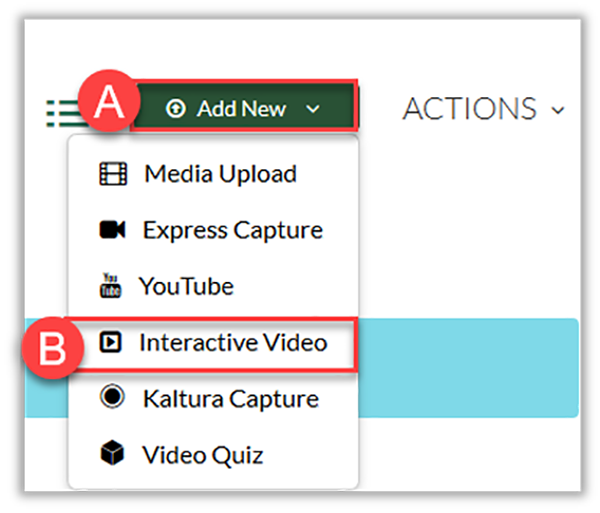
- Click the Add New (A) drop down menu at the top right of the screen.
Set Details
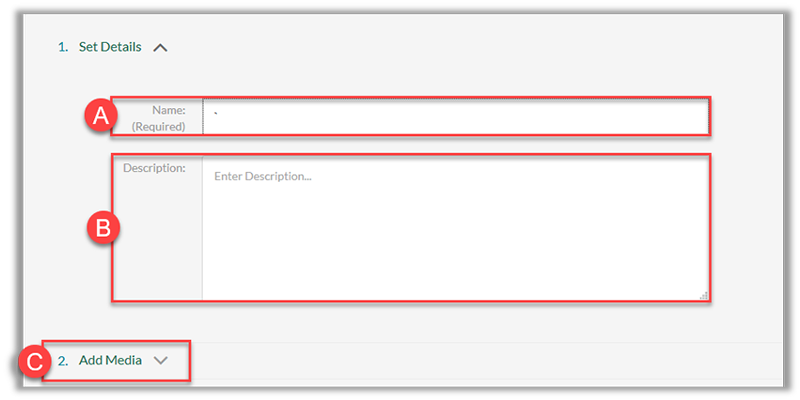
- Add a Name (A), Description (B), and select Add Media (C) drop down menu to display your My Media gallery.
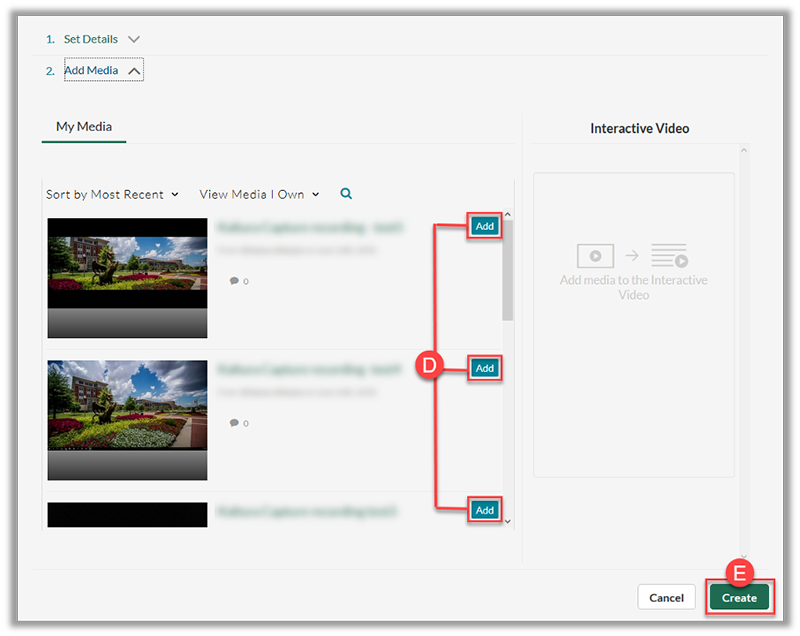
- Locate your desired media and select Add (D) on each video you would like to add to the Interactive Video Path.
- Click Create (E) to begin creating video paths.
Note: Additional videos may be added after adding the video path.
Navigating the Video Composer
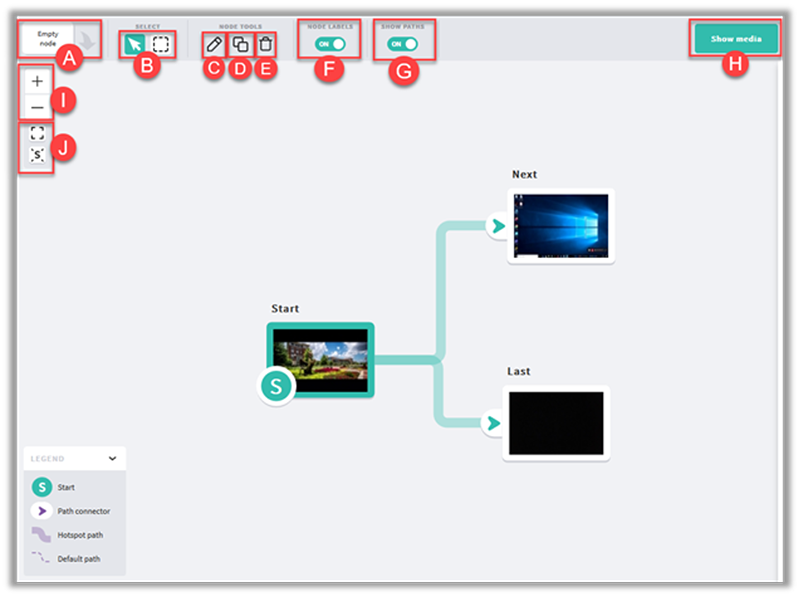
- To add an additional video node to the interactive path, drag and drop the Empty node (A) to the video composer.
- To select video nodes and branches, click the desired Selection Tool (B).
- To edit video node, select desired video and click the Pencil (C) icon.
- To duplicate a video node, select desired video and click the Double Square (D) icon.
- To delete a video node, select the desired video and click the Trash can (E) icon.
- To hide or view node labels, toggle over the Node Labels (F) icon.
- To hide or view paths, toggle over the Show Paths (G) icon.
- To add or remove videos from the media library, click Show Media (H).
- To zoom in or out of the video paths, click the Plus or Minus (I) icon.
- To center video paths on the video composer, click the Square or the ‘S’ (J) icon.
Building Video Paths
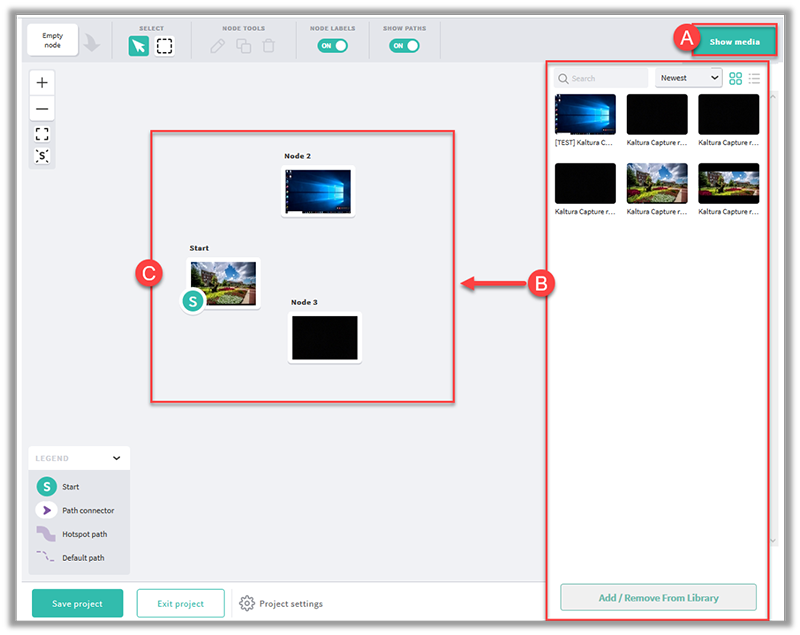
- Click Show Media (A) icon in the upper right of the video composer.
- Locate your desired media (B) you would like to add to your video path.
- Drag and drop your desired media to the video compose (C).
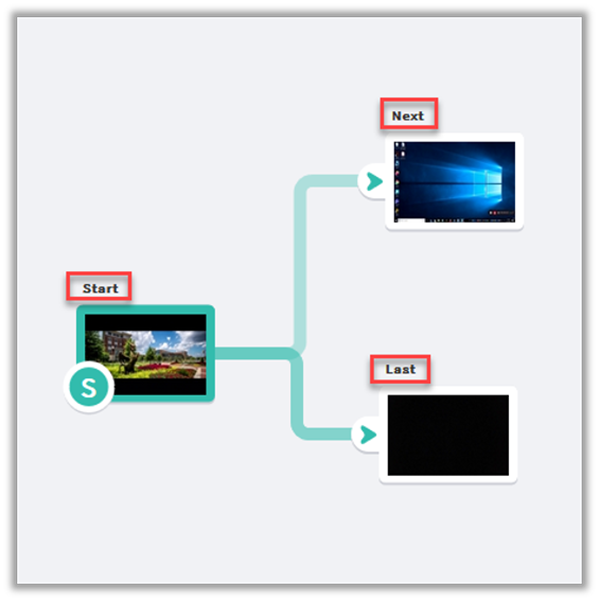
- Double click the node name(s) and add your desired name.
- Hover over the right side of your desired start node and drag and drop the arrow to connect to the next desired path. Repeat this step to connect to the next video paths.
- The connected paths will automatically create hotspots as an access point to navigate to the next interactive video. Double-click a video to see and edit the hotspots.
- Drag and drop the Hotspots (D) from the top left corner to desired location on the video.
- After customizing the hotspots, click the back arrow (E) to return back to the video paths.
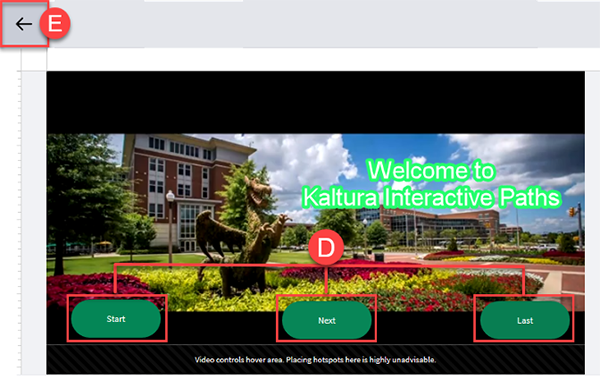
Note: Hotspots can be edited by style, text and background to customize your desired hotspots. The hotspot videos may also be edited to change the start and end the individual hotspot video.
Editing a Node
Double click the desired video node to edit its properties and behavior.
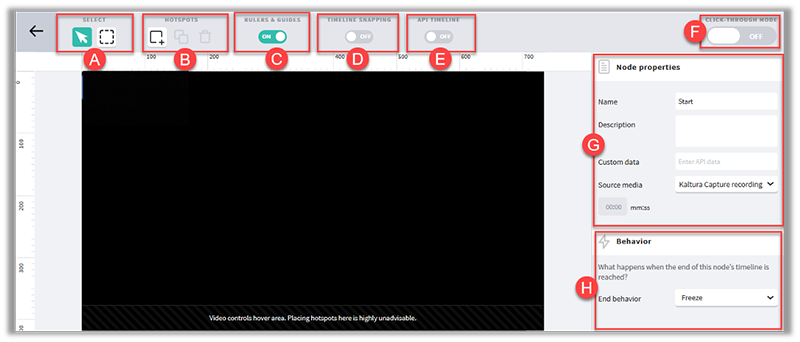
- To select hotspots, click the desired Selection Tool (A).
- To Add, Duplicate, or Delete Hotspots, click the desired tool (B) icon.
- To hide or view video rulers and guides, toggle the Rulers and Guides (C) icon.
- To enable snapping, toggle the Timeline Snapping (D) icon.
- To hide or view API timeline, toggle over the Timeline Snapping (E) icon.
- To click through through your interactive video path, toggle over the Click-Through Mode (F) icon. Note: This allows you to preview how the interactive video path will function.
- To edit video Node properties (G), enter/edit the Name, Description, Custom Data, and Source Media.
- The Behavior (H) is what happens when a node’s timeline has reached the end. There are options to freeze or create a default path so that the video automatically goes to another video.